Thursday, October 30, 2014

Featured Cupcakes & Going ons!

I'm so excited my Angry Bird Cupcakes were featured on Posed Perfections Creative Ways this week.  A big thank you Nici for featuring them!  It made me smile since this was the cake I delivered to a very ungrateful and RUDE mom who didn't even say thank you for the cupcakes that took me 5 hours to make.

Posed Perfection


Next on my list of things going on is more of the remodel!!! We now have counter-tops in the kitchen.  Well on the island side!  We have new cabinets in on that side and now the tile went in.  We picked a really cool charcoal that has flecks of silver that is so pretty! Rick put a high shine on them and they just pop!


He also hung the closet doors in our bedroom and started on the doors in the pantry. I even got busy to organizing my pantry, all rubbermaid is labeled and easy to get to. I also found some amazing lights to hang over the bar side of my island.  I found these regular $50 on sale for $7, yes $7!!  Hopefully those will go up in a week or so.


Have a GREAT weekend!

Tuesday, October 28, 2014

Mummy & Ghost Oreo Cookies

And for Caden's class I whipped up some easy Ghost and Mummies.  I loved how they came out!

What You Need:
Oreo Cookies (Orange Cream if you want)
Candy Melts - White (Almond Bark)
Black candy (or Black Modeling Chocolate)

Melt your candy melts in the microwave, mine takes about 1 1/2 minutes to melt nicely (be careful don't burn the chocolate ... done this many times).  Stir with a fork to make smooth. Dip your oreo in the chocolate make sure to cover top and bottom.  I take a fork to take them out and bang off any extra chocolate.  I then took a fork with some white melts to go back and forth to make the bandge look. I took some black modeling chocolate to make eyes and mouths (I did that for only the ghost).  Put in the fridge to hard up and put into treat bags to pass out (I picked mine up at the Dollar Tree).


Thanks for Stopping by!
Don't forget to see the parties I link up to HERE

Wonderful Wednesday Blog Hop


Welcome to our 97th Wonderful Wednesday Blog Hop!
We had lots of posts shared last week -- 427!!!
Not as many viewed -- you guys are all really busy, aren't you!
Please try to visit a few before you go.
Pin.
Like.
Share.
Comment.
We are so glad you came to our party...truly we are. ♥

Most Viewed 


Very Popular Posts


Editor's Pick

Number 262 on last week's party is this cute little craft. 


Paint Chip Turkey from Born Again Farm Girl


Love this party?


 Simple Guidelines:
 
  • Please follow our host and co-hosts in as many ways possible (social media links below) 
  • PLEASE TWEET THIS PARTY !!!!  We want everyone to know about it!
  • Add as many of your family-friendly posts as you would like, no giveaways please.
  • Visit three or more others. Let them know you've been there!
  • When you are PINNING, remember to do it from the original post. ♥
  • If you are new, be sure to let us know in the comments so that we can follow you back. ♥
  • Thanks for joining us!

Follow our hosts as you can.

Sinea of Ducks 'n a Row 

Leanne, Colleen and Erin … The Sugar Aunts

Elie from Chocolates and Crockpots

Libby and Rachel of Two Keck Girls

Tammy of Creative K Kids

and… Tammy of The Ultimate Linky

Janine from Confessions Of  A Mommyaholic  

Nicole and Susan of Flavors By Four

Lynn from Turnips 2 Tangerines

Kim of 2JustByou

Alexis of Mom2MyCrazy2

Carrie of A Mother’s Shadow

CD of CD's Country Living

Diane of Recipes For Our Daily Bread


Monday, October 27, 2014

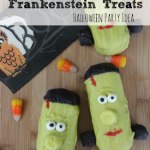
Twinkie Frankenstein

I kept seeing these Twinkie Frankenstein's from Life of a Whisk on a few blog hops and had to give them a try!  These I made for Cole's class since he's in 5th I wanted to do something fun but no too kidish.  These turned out awesome!


Ingredients:
12 oz Green Melting Chips

4 oz Black Melting Chips
1 Red Melting Chip
6 Twinkies
12 Candy Eye Decorations 

  1. Place Twinkies in freezer for at least 30 minutes.
  2. Prepare a baking sheet or cutting board by covering with parchment or wax paper.
  3. Melt green candy chips by microwaving 30 seconds then stirring and repeating until melted.
  4. Dip each Twinkie in chocolate and roll to completely coat.
  5. Transfer to prepared paper.
  6. using a toothpick, spear a mini marshmallow and dip in green chocolate to cover completely.
  7. Position marshmallow in middle of Twinkie to act as nose. Use another toothpick to loose marshmallow from first toothpick and to smooth out chocolate.
  8. Using chocolate as "glue", set 2 eyes just above the nose.
  9. Place in refrigerator for 10 minutes to set.
  10. Lift each Twinkie to separate from paper.
  11. Using a knife carefully trim excess chocolate that ran off.
  12. Melt black candy chips by microwaving 30 seconds then stirring and repeating until melted.
  13. Dip top of each Twinkie in black chocolate to make hair.
  14. Return to prepared paper.
  15. Using toothpick method, dip 8 mini marshmallows in black chocolate to coat completely and place on prepared paper to use as neck bolts.
  16. Place in refrigerator for 5 minutes to set.
  17. Trim any excess chocolate that ran off.
  18. Using chocolate as glue attach neck bolts to sides of Twinkies.
  19. Take the one red chip and heat for 30-60 seconds until melted.
  20. Using a toothpick, draw a mouth on each and draw the forehead scar.
  21. Place in refrigerator for 10 minutes to set.

ALEXIS NOTES: I had to make 20+ of these so I just increased the # of everything used.  I used a little black to make a uni-brow.  For the red mouth I used red gel.  I'm putting these into Halloween treat bags for him to transport for school.  I also used a dark green instead of the lime green she used to make them a little more grown up looking for the 5th graders.


Thanks for Stopping by!
Don't forget to see the parties I link up to HERE

Sunday, October 26, 2014

Peek-a-boo Pumpkin and Spider Cookies

Last year I made a peek-a-boo Pumpkin Cookie (A pumpkin with a smaller pumpkin).  This time I made a pumpkin with a spider in the middle.


I started out with a Sugar cookie found on All Recipes, dubbed The Best Rolled Sugar Cookies.
INGREDIENTS:
1 1/2 cups butter, softened
2 cups white sugar
4 eggs
1 teaspoon vanilla extract
5 cups all-purpose flour
2 teaspoons baking powder
1 teaspoon salt
DIRECTIONS:
1.In a large bowl, cream together butter and sugar until smooth. Beat in eggs and vanilla. Stir in the flour, baking powder, and salt. Cover, and chill dough for at least one hour (or overnight).
2.Preheat oven to 400 degrees F (200 degrees C). Roll out dough on floured surface 1/4 to 1/2 inch thick. Cut into shapes with any cookie cutter. Place cookies 1 inch apart on ungreased cookie sheets.
3.Bake 6 to 8 minutes in preheated oven. Cool completely.
What you Need:
Sugar Cookie Mix (see recipe above or your favorite)
Orange Food Coloring
Black Food Coloring
Large Pumpkin Cookie Cutter
Medium Spider Cookie Cutter

When the sugar cookie recipe was chilled.  I took about 1/2 of the dough and kneaded in some Americolor Orange Gel Food Color and the other 1/2 I kneaded in Americolor Black Food Color (This link is Amazon's but I by mine at Hobby Lobby for $1.99).  I find this is the best way to color anything from fondant to dough.  Once I got the orange I wanted I rolled out the dough.  I took my large pumpkin and cut out the cookies.   Take a spider cookie cutter to cut the middle out. REMEMBER to make sure your inner cookie cutter is smaller so you have enough cookie left around the whole. I then rolled out the black and cut out the spider cookie cutter.  Put the spider in the pumpkin (almost like a puzzle piece) and lightly press to make the two edges stick together.  Bake like normal and rest on a cooling rack or eat right away :).


And if you have black left over make a bunch of spider cookies!

Thanks for Stopping by!
Don't forget to see the parties I link up to HERE

Thursday, October 23, 2014

Monster High Cupcakes Featured

A big thank you to Natasha for featuring my Monster High Cupcakes on her 50+ spooktakular Halloween Ideas.  These cupcakes turned out really cute and I was so happy that I was able to make 2 sets of them for the Charity I work for Birthday Dreams


Say Gday Feature


Have a GREAT Weekend!

Wednesday, October 22, 2014

One More update of what's been going on ...

The remodel is moving along here.  I am crazy busy with the kids and all their activities and me keep over volunteering to make cakes (but I love it so it's a good thing!). I'm trying to get around to say hi to everyone, sorry while we are in this mess.

This week Rick worked on putting in the upper cabinets.  We have a small galley kitchen so we had to put uppers back in, we were able to find a microwave with a vent to get rid of the ugly range fan we had.  It still has a little work to be done adding the back and staining the cabinets but we at least have the feel of how it's going to look.  The new chairs we picked up on clearance look amazing at the bar!


I also put together some fun pumpkin cookies with a spider in the middle for a friend who needed a little cheering up.  


And to end this week I signed up for 2 more cakes to make for Birthday Dreams .. yes I think I may be over doing it. LOL but I love to bring them to the kids.  Here is what is on my list to do.

Seahawk Cupcakes found on Bella Cupcake Couture

Spongebob Cupcakes found on Cakes n Stuff

Have a wonderful day!!

Tuesday, October 21, 2014

Thomas the Train Cupcakes ... Birthday Dreams

And #3 of 3 for the cupcakes made last week.  This was one I quickly put together, not one of my best designs but they were still cute!


What you Need:
White Modeling Chocolate (Candy Clay)
Blue Modeling Chocolate (Candy Clay)
Red Modeling Chocolate (Candy Clay)
Green Modeling Chocolate (Candy Clay)
Yellow Modeling Chocolate (Candy Clay)
Black Modeling Chocolate (Candy Clay)
Large Circle Cutter
Medium Circle Cutter
Frosted Cupcakes
Black Gel
Wilton Candy Eyes

I found from watching the Food Network the Candy Clay I make is called Modeling Chocolate to many decorators.  Hmm go figure!  I made white Modeling Chocolate, I had pink left over from the Monster High Cupcakes.

Modeling Clay
12oz Candy Melts (In Pink and White)
1/4 Cup light corn Syrup

Melt your Candy Melts in microwave (mine takes about 2 minutes). Stir them to become smooth and add the corn syrup.  It will become thick and form a ball.  Wrap in plastic wrap and let it sit out and dry.  Takes a few hours or over night is best. (Alexis note: I found to roll this out use a little powder sugar (like you would do with flour), also you have to kneed it a little like you would dough to make it easy to roll out).


Thomas

Cut out a large circle of the Blue modeling chocolate and a medium circle of white modeling chocolate.  Cut a triangle of black modeling chocolate.  Add the black strip to the top center and put the white over the top. Add your candy eyes and make a nose, cheek and mouth of black gel.

Percy

Cut out a large circle of the green modeling chocolate and a medium circle of white modeling chocolate.  Cut a triangle of black modeling chocolate.  Add the black strip to the top center and put the white over the top. Add your candy eyes and make a nose, cheek and mouth of black gel.

Molly 

Cut out a large circle of the yellow modeling chocolate and a medium circle of white modeling chocolate.  Cut a triangle of black modeling chocolate.  Add the black strip to the top center and put the white over the top. Add your candy eyes and make a nose, cheek and mouth of black gel.

James

Cut out a large circle of the red modeling chocolate and a medium circle of white modeling chocolate.  Cut a triangle of black modeling chocolate.  Add the black strip to the top center and put the white over the top. Add your candy eyes and make a nose, cheek and mouth of black gel.

  
I put them in some plastic cupcake boxes I bought off amazon and delivered to homeless shelter. 

Thanks for Stopping by!

Don't forget to see the parties I link up to HERE.