Thursday, February 25, 2016

Boston Trip Recap

Here is a recap of my work trip! Lot's of laughs and long hours but always so much fun!

I did my best to do healthy meals, get in a work out every morning and did stairs every day up and down!

MOST days I'm in yoga pants since I work from home!
I got to play dress up this week!
Work out's / Food / And outfit done:

Day 1:
 Day 2:
Day 3:
 

Day 4:
 Day 5:

 Day 6 / Event Day!!:

I took a few adventures out on my own, love their weather snow one day sun the next!

Adventure out to Target / Gift Basket Made / Work done / Bible Study done

Starbucks run and picked up reusable cups!

A walk and some snow!

And fun adventures in the hotel room also!

Oh yes even a mud mask!

Girls took me out for a fun night of drinks and dinner!

Funny Airplane Pictures!


Home I went to unpack and enter in all the data from the event!


Fun time! Now I'm back home trying to catch up on work!

Wednesday, February 24, 2016

Boston Trip in the bag ...

I returned this past weekend from my Boston Trip for work. It was a fun tip with a lot of funny stories.
 
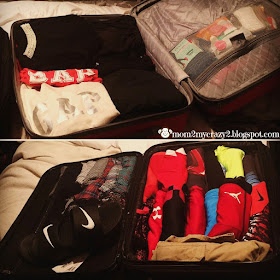
I thought I would be good on my work out journey so I packed my 5lb hand weights with my DVD. WELL my new suitcase weighs a little more then my last one! SO you guessed it I was OVER the 50lbs by 8lbs!!!  OH yes I had to open up my suitcase, butt in the air and remove my hand weights! They even had to look up if weights are ok to carry on a plane from TSA. LOL Oh so my life! So I had to carry around 10lbs of weights in my purse, talk about heavy!

When I flew into Boston it was early morning around 7ish AM their time (yes 4am my time). When we landed the captain came on with the most unconvincing almost comical tone that in his 25 so years of flying this has never happened to him. I was just happy that we were on the ground when his voice came over. It was Negative 5 and the fuel lines had FROZE! Yes you read that right! The fuel was frozen and could not fuel said planes that needed to take off for us to get off the plane. Thankfully I just dozed off for a while, it took about 1 1/2 hours for us to be able to get in and unload. 

While I was on the tarmac waiting to get off said plane, my car service was scheduled to pick me up. So when I got off the plane then waited for my luggage to get unloaded. Around 2 hours or so late I got out to walk in the freezing cold to try to find my car. It was so cold my fingers with in 30 secs thought it had frost bite. You know it's cold when the drivers don't even get out of their cars they are holding up their signs and showing threw the window. After walking up and down all the cars and not seeing my name, I call the car service. To find that my car had left me! Oh yes they said "We thought you weren't coming in so we left" oh yes those were the words told me (while freezing my rear off). "We can call the driver and get him back" ... UM yes please! I'm from WA in MA and don't really have a buddy I can just call, hence the reason I arranged said car! So I went back into the airport and ate a not so healthy burger king breakfast meal (yup telling on myself). Another 20 min and car is back for me!

I get in the car, now most of you know me know I get the CHATTY driver every time!  I am on of those people that get stuck in bathrooms with strangers who need to tell their life story. And for the life of me I can't be rude and walk away (On the phone for work I have no problem, in person it's a loss cause). So when this gentleman wouldn't even give me eye contact and when I asked a few questions gave me the short one word reply. My radar went off, then driving was like driving with your spouse after a fight you can feel the tension. Oh yes I could tell this man was NOT pleased to be driving me. I guess the whole waiting and having to come back to get me was not in his plan for the day!


When I got to the airport I had to wait do the normal "All our rooms are full". I've been here probably 6 times so far and EVERY TIME I fly in early they are overbooked .. lol. Thankfully I set up on the couch and worked my spreadsheet for the event. I got a room about 2 hours after I arrived. I even took the bus over to the mall across the street, less than 2 min ride. Oh yes and had to tip him both ways .. lol I was like really hehe.

The rest of the week went well except the one morning I ran down in my PJ's to grab breakfast to bring it to my room to get ready. Oh yes you guessed it something happened! The fire alarm went off, meaning the hotel had to be evacuated at 8am. At least my PJ's were my Gap sweats, others in PJ's with no socks etc. Let's just say it was very brisk and we were pushed outside until fire department could come turn the alarm off. Thankfully only 20 minutes. Oh yes it's also the ONLY day I didn't' go downstairs with my phone .. lol.


As I say it always makes for fun blogging and facebook post.

I hope I made you giggle with my traveling adventures!

Thursday, February 11, 2016

Valentine Cookies Made ... Lips

I couldn't resist making lips to match the Valentine Kiss card I made for Caden's class. Now I know homemade cookies are usually no no's BUT I bake as a side job SOOO I'm a business on the side and I hired myself to make cookies .. yup my story and I'm sticking too it! 


What you Need:
Lip Cookie Cutter (I found a Valentine 3 pack w/ the lips at Hobby Lobby)
Red Food Gel Color
Sugar Cookies
Royal Icing (Recipe at the bottom of post)
 
I made sugar cookies using my favorite sugar cookie recipe. After they cooled I frosted them with red royal icing (using AmeriColor food color gel). I'm working on my piping skills, but I must say I was happy with how they turned out.


See my Amazon Prime Shopping comes in handy!
GREAT boxes to send to school!
For Royal Icing:

Royal Icing what you need:
2 lbs Powdered Sugar
1/2 tsp Cream of Tartar
5 Large Egg Whites (or equivalent) 
Flavor to Taste
Gel Icing Color

Mix powder sugar and cream of tartar in your mixer, just to make sure it is incorporated in. Slowly add egg whites, then whip start of slow then go to very high speed. She says around 2 minutes, my friend had an older mixer so it took almost 10 minutes. You want stiff peaks that hold on and won't fall off the spoon. Add in your flavor, I would suggest you use a clear flavoring.  This would be the glue texture great for ginger bread houses etc.

Take 1 cup of royal icing in a smaller bowl then add your coloring, lightly mix so you don't get air into the the icing. I'm like her and like the gel coloring. 

For Top Coating - Add 1 1/2 to 2 1/2 tsp Water (This is if you don't want to outline and flood)
For Outlining - Add 1/2 to 3/4 tsp Water
For Flooding  - Add 2 to 3 tsp Water

WATCH her video on How to Top-Coat, Outline, and Flood Cookies. YES it is around 7 minutes BUT if you have never done this technique it's a MUST she explains it perfectly.

Wednesday, February 10, 2016

Valentine Kisses Photo Card

I love to make gifts the kids give to others, valentine's are my favorite to do. We've done so many different versions but on to Google I went and found a photo card to make! I love this Valentine Kiss Photo idea on My Insanity.
 
What you Need:
Photo of kid (Close up is best, not full body)
Valentine Kiss Chocolates (Found mine at Winco in Bulk section)
Hot Glue Gun
 
I took the photo of Caden and uploaded to PicMonkey (they are a free photo editing site, I use it to put my blog name on all the pics I upload). I then added the heart and lips and fonts, you can use their font's or whatever font is loaded on your computer by clicking on your font. 
 
When my photo was all fixed up I sent them to Walgreen's one hour photo. NOW I didn't pay attention when I uploaded and some of my font was cut off, pay attention when you upload. I printed a few that we'll send to family from my home computer. Take your hot glue gun and glue the lips onto the photo. 
 

Happy Valentines Day!

Tuesday, February 9, 2016

Flying all over the world ...

Life has been a little crazy here with my work and family life. Work has been a little overloaded since I work for a company in MA and it's big time political season. Our company was bring the candidates to the public. So we put on two events one for Ted Cruz and one for Donald Trump. Way exciting and a ton of phone calls about the events. Work is starting to go back to the normal grind and I'm getting a little breathing room.
 
On top of all that I'm head to Boston next week and ... wait for it .... my oldest was invited to head to MEXICO with his best friend for a winter break!  AND daddy gets to stay home with our youngest. He got the easy job this time, usually when I head for work he has both kids to deal with. 
 
I was smart this time and packed my bag and his bag this past weekend so I won't be running around crazy. He leaves Wednesday AM and I leave Saturday PM. Wish us luck! On some fun news! I became a grown up (yes at almost 40) I bought my own suitcase and in a bright PINK so no more guesses at the airport!  My amazing husband even walked my pink suitcase around the mall and we finished up some shopping needed for mine and Cole's trip!
 
A big thank you to my husband who pushed me to go into Wilson Leather since he had a $10 coupon that was about to expire. I DON'T EVER spend money on myself, I hate to. So he pushed me into spending $64.99 on a new suitcase but a GREAT deal regular $250!!!
 
AGAIN wish us luck .. LOL!


Thursday, February 4, 2016

Pizza Meatloaf with Ranch Roasted Red Potatoes

Next was a requested meal of meatloaf and potatoes. Over the years I've done SEVERAL different versions of meatloaf. This past week I found an amazing recipe on .... YES you called it Drizzle Me Skinny for Pizza Meatloaf. My husband actually liked it so much he has asked that we do it again soon. To go with the meatloaf I found a skinny Ranch Roasted  Red Potatoes on Laaloosh that was really tasty also.


Pizza Meatloaf:
Ingredients
  • 1.5lbs raw extra lean ground beef
  • ½ cup diced peppers
  • ½ cup diced onion
  • ½ cup panko bread crumbs
  • ⅓ cup reduced fat shredded mozzarella
  • ⅓ cup pizza sauce
  • 2 tsp italian seasoning
  • 20 pepperoni slices, cut into small pieces (56g)
  • Topping
  • 2 Tbsp pizza sauce
  • ¼ cup reduced fat shredded mozzarella
  • 15 pepperoni slices (42g)
  • Sprinkle of italian seasoning
Instructions
  1. Preheat oven to 350F, line a baking sheet with parchment paper (use a baking sheet with raised edges as there will be grease from your beef as it's cooking)
  2. Cut your 20 slices of pepperoni up into small pieces.
  3. In a large bowl mix all of your ingredients together using your hands (except topping ingredients)
  4. Form into a log shape, approx 10 inches long.
  5. Bake in oven for 55 minutes, remove from oven and spoon your 2T pizza sauce on top. Add cheese and top with pepperoni slices and seasoning. Return back to oven for 15-20 minutes.
  6. Let cool for 5 minutes then cut into 8 slices. Each slice is 4sp or 4pp
  7. *Note, you can cut slices thinner for more of a yield, there is 34 smart points in total in recipe based of my ingredients, so if you cut into 10 slices you can do the math.. Feel free to add extra 0 point toppings such as mushrooms..
  8. * I added pictures of the nutritional info for both my pepperoni and my cheese so you can compare with a similar brand.
ALEXIS NOTES: I used Turkey pepperoni.

Ranch Roasted Red Potatoes:

Ingredients

  • 12 oz red potatoes, washed and quartered
  • 1 packet Ranch Dressing Dry Mix
  • Non fat, olive oil cooking spray
  • 1 tsp salt

Instructions

  1. Preheat oven to 425 degrees.
  2. In a large bowl add potatoes and spray lightly with the cooking spray. Then, add in the Ranch mix and salt, and toss well to coat each potato piece evenly.
  3. Spray a baking sheet with non stick cooking spray and spread out potatoes evenly on sheet.
  4. Bake in oven until potatoes are cooked through, and edges start to turn very dark brown, approximately 20-25 minutes.
Thanks for Stopping by!

Don't forget to see the parties I link up to HERE.

Wednesday, February 3, 2016

Chicken Bacon Alfredo Pasta Bake (Drizzle Me Skinny)

Another Hit meal that I prepped a head of time and put in the oven right before I went to sit in the sauna to kick this sinus infection.  Now my turkey bacon got a little darker then I wanted but I will eat bacon any way .. lol.

Another great recipe from my new favorite site for meal planning, Drizzle Me Skinny! She posted this Chicken Bacon Alfredo Pasta Bake and I knew I had to make it! I was in heaven and even slipped in some broccoli and no one cared!


Ingredients
  • 2 cups (uncooked) 100% whole wheat high fiber pasta (see picture below for the kind I use)
  • 10 oz cooked shredded chicken breast
  • 1 cup reduced fat alredo sauce
  • ¼ cup light ranch dressing
  • ¼ cup almond milk
  • ⅔ cups light shredded mozzarella cheese
  • 4 slices Oscar Mayer center cut bacon, cooked and crumbled (as an alternative you can use bacon crumbs or turkey bacon)
Instructions
  1. Boil your pasta on the stove.
  2. Preheat oven to 350F, spray a 9x13 casserole dish.
  3. In a large bowl mix your pasta, cooked chicken, alfredo sauce, ranch and milk together.
  4. *Optional, feel free to add in vegetables, I just choose not to. It will not increase the point values
  5. Pour out into your casserole dish and top with cheese and then your bacon.
  6. Bake in oven for 20 minutes. Cut into 6 servings.. 6pp and 7sp per serving

Alexis Notes: I used turkey bacon (which got a little darker then needed) and I added broccoli. I also cheated and threw this all into the casserole dish and baked it in the oven at 350 for 50 min. The noodles went in uncooked and the juices and etc cooked them. I also added in 1/2 cup of broth (which will throw off your numbers, I'm not doing WW just like healthy meal options).

Thanks for Stopping by!

Don't forget to see the parties I link up to HERE.

Tuesday, February 2, 2016

Skinny Easy Taco Pie (Drizzle Me Skinny)

As some of you may have seen on facebook I'm fighting a sinus infection. That with work being off the chain busy, I'm behind on my post. I'm writing this right now sitting in my sauna at home hoping to sweat this crud out!

Since I've been under the weather I've been trying out some new meals that aren't too time consuming. I have come across this amazing site Drizzle Me Skinny! I'm in love with her recipes AND she actually will comment back to me on Instagram! OK this may seem silly but it really impresses me when ppl comment back.  She posted a top 10 recipes family favorite meals and this Taco Pie was on it. I must say I could have ate the whole pie myself!

Ingredients
  • 1 pack of Pillsbury reduced fat crescent rolls
  • 1lb lean ground beef
  • ⅔ cup of salsa
  • 1 package of taco seasoning
  • ⅔ cup light grated cheese
  • *Optional to top with lettuce, tomatoes and onions etc
Instructions
  1. Preheat oven to 350F
  2. Heat up your ground beef in a frying pan on stove, once cooked drain fat. Add salsa and taco seasoning, I only use half the pack of seasoning so it is not to strong tasting. Simmer for 5 minutes.
  3. Place your crescent rolls into a 9 inch pie dish, making sure to cover all areas. This may require breaking up some of the rolls to fill in spaces. Pre-bake crust for 5 minutes to avoid the middle not cooking through..
  4. Place your meat mixture into the pie dish and spread evenly, sprinkle with cheese.
  5. Bake in oven for approx. 10-12 minutes, checking often. Serves 6 at 8sp or 7pp per slice.
Alexis notes: I used a thin crust pizza dough instead of crescent rolls (it was a little less calories etc and easier to work with). I did add a little salsa and non fat sour cream on the boys meals.

Thanks for Stopping by!

Don't forget to see the parties I link up to HERE.