Protected by Copyscape Web Plagiarism Check

Thursday, July 31, 2014

Summer Camp Care Package in the Mail

Cole left for summer camp on Monday with our church.  He loves this week long adventure, it can be a little tight getting the money for it but I love to make it work for him.  We sent him off with his buddies and a few treats, but I love to be able to send him a surprise in the mail.  I sent him a care package last year (I just took a look at the post it got over 1100 hits, love to see that).  He loved that one and was asking if I would send another one ... I kept telling him if I can get the time (of course know I would but love to surprise him .. lol).


What you Need:
Homemade Cookies (I made Camp Cookies found on Summer 365)
Oreo's Cookies in can
Playing Cards
Fake Mustaches
Book
Silly String
Beef & Cheese Stick
Zombies
Science Make your own Snow
Candy & Candy Bars
Gum
Glow Sticks
Book (Comic style book)

I made up a quick batch of homemade cookies.  These cookies are freaking amazing (Yes I broke my diet and ate 3 it was a VERY bad day .. lol).  I then hit up the Dollar Tree and found some fun items to stuff in the box.  Pack it all up, if you're not running behind like me you can write fun things on it.  Add some tissue paper to make so it doesn't slip around, and tape it all up.  In the mail it goes!


What you need:

Leaving for Camp

Have a great weekend

Frustrations ....

A while back around 2 years ago I did a Valentine box project for the kids.  I do like normal link back to the creator and gave thanks.  About 6 months ago she sent a nasty comment on the post asking I take down the directions that she wanted the people to come to her site.  So I obliged and took down the instructions and made a note why I did so.  Then this week I get another nasty gram from her about the pictures I left up of the kids making the boxes.   I'm not going to link to her here, I just will leave it be.  I'm blowing steam off here.

I so know how it is when you make a craft (unlike her comment that I need to create my own stuff and stop stealing others project ... I do many of my own ideas also) and have someone put it on their site and NOT link to you.  I have several of my ideas that are on other's sites with no mention of me, I just don't sweat it.  There is so much going on to have to make sure I get credit and to pump up my hits to my blog.

Maybe I should have printed out her business card and handed out at school when people asked about the boxes .. LOL.  Every time I go to a party from now on with something I made I'm going to pass out the website I found it on to make sure people get the credit .

I really do get where she is coming from I'm just over it and had to vent.  It has been a REALLY rough week and this was just the icing on the cake of a crap week .. lol.

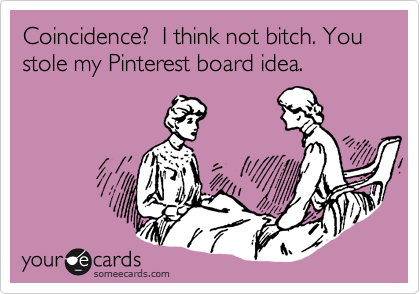
AND to make you laugh

Tuesday, July 29, 2014

Cakes for Charity ... My Little Pony Cake (Rarity)

Next on my list for cakes to make for Birthday Dreams was a My Little Pony Cake.  I went on the search for a perfect but easy cake idea.  Well I found tons of cakes but no easy step by step.  So I did my own thing!  I wanted to do Rarity which is the White Unicorn with purple hair.

I started with my Moist White Cake that I tinted one pink and one purple.  I found a My little pony coloring page that I used as my template.  I cut it down to the size I needed, check out my Google Drive HERE to print it out.


While I let my cakes had cool. I made up a batch of my favorite Sturdy Buttercream frosting. When the cake was cooled, I took my template and cut out the Pony's.  I placed a tablespoon or so of frosting onto the cake board and put my first pony cake out.  Place some frosting on top and then topped with my 2nd pony cake.  I then crumb coated with a light frosting layer.

I put my cake in the fridge to firm up (we've been having unusual HOT weather here).  I made up a batch of my favorite Rolled Buttercream Fondant.  I took about a 1/4 of the fondant and tinted it Purple using AmeriColor Regal Purple food coloring.  I took a about 1/8 of a cup and made the eye.  I used a petal leaf cutter I bought at Hobby Lobby to make the eye shape.  I used the large in white fondant, medium in blue fondant and the small to cut black fondant (see pictures below).

For the hair I rolled out my purple fondant using a circle cutter and my hand placed it on the head. NOW the template I used had two ears!  The pony I was doing had a horn!  So I moved my ear to the center to be a horn and place the purple hair around it.


Not one of my prettiest cakes but I sure hope that the little girl enjoyed it.  I took this cake to a domestic violence house so I had to be buzzed in and drop the cake off at the front and never got a chance to meet the little girl.

I used my square cookie cutter to cut out three in the blue shade (using AmeriColor Royal Blue Food Gel).  I added a mouth and a little black fondant to the ear (black was created by using AmeriColor Super Black Food Gel).  

I covered my cake in white fondant, cut off the extra and then added the touches (see photos below). 

All packed u and ready to go!
I pick up these cake boxes at Hobby Lobby.

You don't have to bake to help Birthday Dreams, please check them out.
Don't forget to see the parties I link up to HERE.

Monday, July 28, 2014

Cakes for Charity ... Barbie Cupcakes

Next on my list for Birthday Dreams was to do was a Barbie theme for sister of the boy I did the Mickey Mouse Cake for.  Now I was going to make a a barbie cake, you know the one that has a barbie in the cake.  BUT I'm sorry to say they kind of creep me out so I didn't make one.  So I went on the search to find out what I could make.  I came across an idea for Barbie Silhouette Cupcakes on Blow Out Party. I took this idea and ran with it.


What you Need:
Cupcakes (I made Chocolate see recipe below)
Frosting (I used my Sturdy Buttercream Frosting - click link)
Zebra Print Cupcake Wrappers (bought at Hobby Lobby)
Fondant (I used my Rolled Buttercream Fondant)
Barbie Cookie Cutter (found on Ebay)

I made the chocolate cupcakes (see recipe below) and let them cool.  While they cooled I made a batch of my sturdy buttercream frosting and dyed it Hot Pink.  I then frosted the cooled cupcakes.  I broke my batch of fondant into 3 balls.  One large ball of Fondant was kept white, one I made black and one hot pink.

I rolled out my white fondant and took my circle cutter to make the base the silhouettes on. I let the circles dry out a little bit, to let them harden.  I then rolled out my pink and cut out 12 silhouettes with the barbie cookie cutter.  I then rolled out my black and cut out 12 silhouettes.  I attached the silhouettes with a little water to the circles.  


I let them sit out a little bit to harden also.  NOW this works perfectly when you're not reaching temps in the high 90's (which we were) so into the fridge they went until they were delivered.

Once your toppers are hard attach them to the frosted cupcakes


Chocolate Cake was requested so I made the Moist Chocolate Cake found on Foodess again.
Ingredients
  • 1¾ cups all purpose flour
  • 2 cups granulated white sugar
  • ¾ cup unsweetened cocoa powder
  • 1½ tsp baking soda
  • ¾ teaspoon salt
  • 2 large eggs
  • 1 cup buttermilk (or substitute by putting 1 tbsp white vinegar in a cup then filling the rest up with milk; let stand 5 minutes until thickened)
  • ½ cup butter, melted
  • 1 tbsp vanilla extract
  • 1 cup hot coffee (or 2 tsp instant coffee in 1 cup boiling water)
Instructions
  1. Preheat oven to 350 degrees. Grease and flour two 9-inch baking pans (or line with parchment paper circles) and set aside.
  2. In the large bowl of a standing mixer, stir together flour, sugar, cocoa, baking soda, and salt. Add eggs, buttermilk, melted butter and vanilla extract and beat until smooth (about 3 minutes). Remove bowl from mixer and stir in hot coffee with a rubber spatula. Batter will be very runny.
  3. Pour batter evenly between 2 cupcake pans  and bake on middle rack of oven for about 20 minutes, until toothpick inserted in center comes out clean with just a few moist crumbs attached.

Here they are packaged up and ready to go:

You don't have to bake to help Birthday Dreams, please check them out.
Don't forget to see the parties I link up to HERE.

Sunday, July 27, 2014

Cakes for Charity ... Mickey Mouse Cake

Another cake for Birthday Dreams done.  This is actually a cake I've done before so it was easy to do since I had it in my head how to do.  I had a little 2 year old boy at the shelter who requested a Mickey Mouse Cake, I went to the Mickey Mouse Cake I made for Caden last year.

What you Need:

Your favorite cake recipe (I made a chocolate cake as requested see recipe below)
2 6" Round baking pans
1 8 or 9" (I prefer 9) round baking pan (I just used 2 9" and cut out 2 circles out of one cake)
Frosting (I used my Sturdy Buttercream Frosting)
A big surface to put the cake on (I used a cake board)


Make your cake mix (see recipe below). Pour mix into greased pans and bake until done (I swear by Wilton's Cake Release). Stick a toothpick in to check it is done, as soon as the cake comes out of the oven, take a butter knife and run it around the edges of the cake to make sure it is separated from the pan. Let the cakes cool 15-20 minutes. 

While cake's cool I split my batch into 3 colors.  For the yellow I used a 1/4 cup then broke up the rest of the frosting into 2 batches.  One in Red and one in Black.  I used AmeriColor Super Black, Super Red and Lemon Yellow food gel (I pick mine up at Hobby Lobby but Amazon also sells them).


Then, remove them from the pan, evening the tops (which will then become the bottom, if needed). Place the cakes on your cake base (I used a cake board). Classic Mickey has 2 ears connected to the head (so you cut a moon off each small circle - see picture below).  The Tootles version you would leave the small circles with no cutting.  Once cake is cooled, I frost it.  I decided that I would do the top half (the ears and half the large circle) black and the bottom red.  I then put the cake back into the fridge to harden up the frosting.  I then took yellow frosting to make to ovals like buttons on the red and added a little black to look like button holds.  I also added red frosting gel with the #2 on each ear.  


For the Chocolate Cake I used a Moist Chocolate Cake found on Foodess.  I volunteered at the shelter the following week with my church and the mom I made the cake for her child came up to me to tell me how moist and yummy the cake was.  I was so tickled to hear this. I made another cake for her daughter and used the same cake recipe (Barbie post to come tomorrow).

For the Chocolate Cake Recipe:
Ingredients
  • 1¾ cups all purpose flour
  • 2 cups granulated white sugar
  • ¾ cup unsweetened cocoa powder
  • 1½ tsp baking soda
  • ¾ teaspoon salt
  • 2 large eggs
  • 1 cup buttermilk (or substitute by putting 1 tbsp white vinegar in a cup then filling the rest up with milk; let stand 5 minutes until thickened)
  • ½ cup butter, melted
  • 1 tbsp vanilla extract
  • 1 cup hot coffee (or 2 tsp instant coffee in 1 cup boiling water)
Instructions
  1. Preheat oven to 350 degrees. Grease and flour two 9-inch baking pans (or line with parchment paper circles) and set aside.
  2. In the large bowl of a standing mixer, stir together flour, sugar, cocoa, baking soda, and salt. Add eggs, buttermilk, melted butter and vanilla extract and beat until smooth (about 3 minutes). Remove bowl from mixer and stir in hot coffee with a rubber spatula. Batter will be very runny.
  3. Pour batter evenly between the two pans and bake on middle rack of oven for about 35 minutes, until toothpick inserted in center comes out clean with just a few moist crumbs attached.
  4. Allow to cool 15 minutes in pans, then run a butter knife around the edges of each cake. Place a wire cooling rack over top of each pan. Wearing oven mitts, use both hands to hold the racks in place while flipping the cakes over onto the racks. Set the racks down and gently thump on the bottom of the pans until the cakes release. Cool completely before handling or frosting.


You don't have to bake to help Birthday Dreams, please check them out.
Don't forget to see the parties I link up to HERE.

Thursday, July 24, 2014

I've Been Featured on

Last Friday I was featured on Pin Me on Diana Rambles (the amazing blog designer who did my blog, like it check her out).  This is the 2nd party she has featured of mine, it makes me so happy when one of my parties is featured.


Diana-Rambles

Caden's Snack Bar was featured

Check out the whole Despicable Me Party I did if you would like.


A BIG THANK YOU to Diana!


My Motto for life ... LOL

Most of you know by know I'm a sucker for a themed party and bring an amazing cake.  I posted this awhile back on Facebook and forgot to share it here.  I love Julia and this quote sums up my motto for life ... teehehe.  I am usually that crazy person that shows up to meeting with something good to eat.


Tuesday, July 22, 2014

Cakes for Charity ... Princess Castle Cake

Next on my list for Birthday Dreams was a Princess themed party.  I found a Princess Castle Cake on Single Mormon Mommy. This was a pretty simple cake to make, I did put a little more frosting then I normally would when I put fondant on.  The little girl requested extra frosting. 


For this cake, you’ll need
- A cake mix (ALEXIS NOTE: I made my own - see recipe below)
- A can of frosting (ALEXIS NOTE: I made my own - see recipe below)
- 4 Ice-cream cups
- 4 Ice cream cones
- Pink icing that comes in a tube (ALEXIS NOTE: I Made Pink Fondant)
- Cotton Candy for the clouds (ALEXIS NOTE: I skipped this part)
- Pillow mints for the castle “stones” 
(ALEXIS NOTE: I skipped this part)
- Toothpicks
- Paper or pink fondant (ALEXIS NOTE: I made Brown Fondant window and door. For Flags I used Birthday ones I picked up at Hobby Lobby)
To make it easy to get the cakes out whole, you might want to line the bottoms of the pan with cut-to-size parchment paper. We actually used regular paper and just greased it. (ALEXIS NOTE: I use Cake Release it works every time!)
After giving both cakes a good crumb coating (How? Microwave about 1/3 cup frosting for 5 seconds & spread a thin layer over everything to keep crumbs at bay) put the square cake on the serving tray and the loaf cake on top, right across the center. If your loaf was a little too long for the square you can safely take a slice right out of the middle, push the ends together, and hold them in place with toothpicks. (ALEXIS NOTE: I used too much frosting due to the request for extra frosting.)
Then cut out out windows door and flags. Be sure the flags are cut on the fold so they’ll wrap around a toothpick. You can “glue” them onto the top of a toothpick using a little icing. To mount the flags, you’ll need to slice the ends off 5 sugar cones, making a hole just wide enough to hold a toothpick. (ALEXIS NOTE: I made some brown fondant and cut the windows and door.  I also made a few pink fondant balls to add a little something special to the cake.)
Now you just need to mount your flags and add your windows and doors. Add pillow-mint key stones and whatever other decorations you like. (ALEXIS NOTE: I skipped the mints.)
ALEXIS NOTES: I used my Sturdy Buttercream Frosting and Rolled Buttercream Fondant.  To get the right Pink I used Americolor Electric Pink Gel food color.


For the Cake I used The Best Chocolate Cake Recipe found on Add a Pinch (See the recipe and pictures below)


Ingredients
  • Chocolate Cake
  • 2 cups all-purpose flour
  • 2 cups sugar
  • ¾ cup unsweetened cocoa powder
  • 2 teaspoons baking powder
  • 1½ teaspoons baking soda
  • 1 teaspoon salt
  • 1 teaspoon espresso powder
  • 1 cup milk
  • ½ cup vegetable oil
  • 2 eggs
  • 2 teaspoons vanilla extract
  • 1 cup boiling water
Instructions
  1. Preheat oven to 350º F. Prepare two 9-inch cake pans by spraying with baking spray or buttering and lightly flouring.
  2. Add flour, sugar, cocoa, baking powder, baking soda, salt and espresso powder to a large bowl or the bowl of a stand mixer. Whisk through to combine or, using your paddle attachment, stir through flour mixture until combined well.
  3. Add milk, vegetable oil, eggs, and vanilla to flour mixture and mix together on medium speed until well combined. Reduce speed and carefully add boiling water to the cake batter. Beat on high speed for about 1 minute to add air to the batter.
  4. Distribute cake batter evenly between the two prepared cake pans. Bake for 30-35 minutes, until a toothpick or cake tester inserted in the center comes out clean.
  5. Remove from the oven and allow to cool for about 10 minutes, remove from the pan and cool completely.


You don't have to bake to help Birthday Dreams, please check them out.
Don't forget to see the parties I link up to HERE.

Monday, July 21, 2014

Cakes for Charity ... Pirate Ship Cake

My first cake for Birthday Dreams was a Pirate Ship Cake for a homeless kid.  I saw this cake on a blog hop from Suburban Wife City Life a few days before I volunteered and guess what cake the little boy wanted yup a Pirate Cake.  Perfect and it was really pretty easy to make, love when God leads me that way. 


Supplies Needed:  
3- boxes of cake mix (I made my own cake mix see link below)
3- containers of icing (I made my own frosting see link below)
Cardboard (Alexis Note- I used a Large Cake Board)
Chocolate chips (Alexis Note - I used Wilton Candy Melts in Yellow and Brown)
1- Dowel rod
Making the Cake:

We mixed 2 cake mixes together and used a 9 x 13 and filled it with 3/4 of the mix.  Then filled a loaf pan with the remaining batter.  We used an additional mix for a 9 inch round pan.  Splitting 1/2 and 1/2.  Note:  Make the cakes earlier in the day so they have time to cool.  

ALEXIS NOTES: I'm not a fan of box cake so I made my favorite Yellow Cake.


Cutting the Cake:
Take your rectangle cake and make cut to make the shape of the bow of the ship.  I used the round cake and cut it into a triangle for the front of the ship.  For the back of the ship I took the loaf pan shape and trimmed to fit.  Frost the whole cake, now I used frosting so I didn't put a lot of frosting on.  I used my Sturdy Buttercream Frosting and my Rolled Buttercream Fondant.  I made the fondant black using AmeriColor Black Food Gel.  I rolled it out and covered the 3 cakes. 


Chocolate Railing and back:
We heated up in a double boiler (a bottom pot with water and a top pot with the chocolate) some chocolate chips, with a little vegetable oil to thin it out.
We measured where the railings would be so we would know exactly how tall and long we would need.
Place the chocolate in a plastic baggie, snip one corner and pipe out the railings and back.   


ALEXIS NOTES: For the chocolate I took chocolate melts and melted them in the microwave.  I used a tape measure to measure how long I would need each strip and railings, made a marks on a piece of wax paper.  For the back I Made a half Circle.  After you let it dry then you can add it to the cake.  Since I used Fondant I had to use a little frosting to attach.  I used a wood dowel and printed off some pirate flags from Paging Supermom. I added a little personal touch's like some chocolate Bones and Skulls.  I then cut a hole in the center and added some gold coins to look like a pirate chest in the cake.  Don't worry if your cake breaks like mine did use a little frosting like glue :).

Not bad for my first big cake.  
Next time It will be cleaner but I thought it turned out cute.

You don't have to bake to help Birthday Dreams, please check them out.
Don't forget to see the parties I link up to HERE.

Sunday, July 20, 2014

Cakes for Charity ... Olaf Cake

Some of you follow me on FB and know I love a Charity called Birthday Dreams, they bring birthdays to homeless kids.  I've been so excited to be able to bring a kid a birthday cake. And you know me and my themes, so this is right up my alley.


This was actually the 3rd cake I made for them, but he was so cute I had to share him first.  I found this idea for a Olaf Cake on Fun Finds for Family.  It was so simple for the template I printed out the Olaf template on The Sensible Mom.  Blow up the image to fit the size of cake you would like.

The little girl who requested Frozen as her themed asked for confetti cake.  NOW most of you know me and I HATE box mixes and avoid if I can.  I found Easy Homemade Funfetti Cake on Sallys Baking Addiction.

First Make your Cake I made 2 LARGE round cakes.

Ingredients:

CAKE

  • 1 and 2/3 cup (210g) all-purpose flour, careful not to overmeasure
  • 1/2 teaspoon baking powder
  • 1/4 teaspoon baking soda
  • 1/2 teaspoon salt
  • 1/2 cup (1 stick or 115 g) unsalted butter, melted
  • 3/4 cup (150g) granulated sugar
  • 1/4 cup (50g) light brown sugar
  • 1 large egg
  • 1/4 cup (60g) yogurt  (plain or vanilla; or greek yogurt; or sour cream)
  • 3/4 cup (180ml) milk (cow's milk; or soy milk; or almond milk)
  • 1 Tablespoon (15ml) vanilla extract
  • 2/3 cup sprinkles (not nonpareils)

Then to make your olaf cake:

Ingredients

  • Creme-filled cookies
  • Miniature creme-filled cookies
  • Chocolate licorice
  • Orange frosting
  • Black frosting
  • Buttercream frosting (preferably, the easiest homemade buttercream frosting ever)
  • 1 box of cake mix

Instructions

*Note: Leave yourself enough time. When making a homemade cake like this, I start at least 24 hours before I need to present it. This allows time to freeze the cakes before decorating, which is one key ingredient to pulling these together.
1. Bake your cake mix, according to instructions. Use your mix to make two 8-inch round cakes.
2. Allow cakes to cool.
3. Freeze cakes, preferably overnight.
4. Make your Olaf template. I used a Frozen worksheet (see below) that we found at our local library. I traced the Olaf head onto a blank piece of paper. Then (just eyeballing it), I made that traced head slightly larger – large enough to cover one 8-inch round cake.
5. Once satisfied with your Olaf cake template, take your cake out of the freezer and place template on top. Using a sharp knife and small cuts, carefully cut around your template to shape the cake. Remember to go slowly… it’s tougher to add cake back on than it is to cut a bit more off.
6. Put cakes back in the freezer.
7. Mix your buttercream frosting.
8. First, spread your cakes with the buttercream frosting.
9. Refreeze frosted cakes while you prepare the rest of your ingredients.
10. Here’s what I used:
  • For eyes: Half of a creme-filled cookie for each eye. Use a mini creme-filled cookie for the inside of the eye.
  • For nose: Dollop of orange frosting
  • For mouth: Black frosting mixed with our white buttercream frosting to make a charcoal grey. Tip: We made a separate template for his mouth. We cut the inside of the mouth out, set it on top of the cake and spread our frosting in the middle, using that template like a stencil. When we pulled our stencil, this gave us a sharper edge all around.
  • For tooth: I didn’t want to spend money on fondant for such a small piece. This was a little tough, but I gently scraped the inside of a creme-filled cookie and called it a tooth.
  • For buttons: Creme-filled cookie. Use just half the cookie – or the full.
  • For eyebrows: Chocolate licorice
  • For hair: Chocolate licorice
  • For arms: Chocolate licorice
ALEXIS NOTES: For the nose I took a ice cream cone broke it down to the size I wanted and frosted orange.  For the mouth, eyebrows and inside eye I used black fondant (cut it in the shapes I wanted).  For Tooth I built up my frosting to look like a tooth.  Buttons I used York Mint Patties.  I used my favorite Sturdy Buttercream Frosting that holds up and taste so YUMMY.


You don't have to bake to help them, please check them out
Don't forget to see the parties I link up to HERE.

Created by MyFitnessPal - Nutrition Facts For Foods

Thank You to My Wonderful Sponsors!!!

1800flowers
Baby Pop
BzzAgent
cafe Press
CSN
Easy Lunch Boxes
Faith Words
Glasses USA
Great Wolf Lodge
Hachette
Jump Start
My Baby Clothes Boutique
My Blog Spark
Ouchies
Pleasures.com
red envelope
She Speaks

tote bags
Strap Doctor
You Can Make This

Total Pageviews

Awards I've been Given! You Really Love Me!! (Yes my best Oscar Speech)

Photobucket
Photobucket
Photobucket
Photobucket
Photobucket
Photobucket
Photobucket
Photobucket
Photobucket
friendhip2 from Anissa
passoinate-blogger-award (Heidi @ Tried & True Cooking)
You're a Superstar Blogger
you-dont-say-post - Kristie Notes
Annisa (Over the top)
Jessica Mommy Needs Coffee (Lovely)
Annissa (Queen Award)
Your Blog is Fabulous
Best Comedic Performance
Splash Award
Best Blog Award
Dragon's Loyalty Award
Photobucket
The Heartfelt Award
Daffy Commenter Award
 
Pin It button on image hover