Protected by Copyscape Web Plagiarism Check

Thursday, May 29, 2014

Friday Diet Humor

Yes it's that time again diet update and a little diet humor to make you laugh.  It's been a tough few weeks but I'm down 9.6lbs!  I'm very excited that it's going down, only 30.4lbs to be where I was when I lost all the weight last year.  I'm not upset with myself I'm just going to keep moving forward, praying for strength to keep me on this path and I hope to be there soon!  I'm doing the Omni drops which is super hard it's a VERY strict 500 calorie diet with their drops.  My friend is loosing like crazy like 20+ lbs in 3 weeks.  ME of course don't loose like that.  I am on my 2nd week and I'm down 5.4lbs which in my world rocks so I'm just going to be happy not sad I'm not loosing like others.

Now for diet humor!
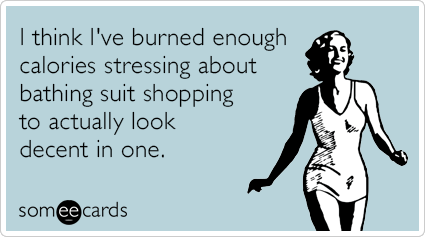
Oh yes this has been me in the past:

Wednesday, May 28, 2014

Wine Lover's Gift ... Masking Tape + Shoe Polish Vase

Next on my list of DYI Gifts is one the boys made for my mom.  It started with my mother's day gift, Cole made me one of these really cool vases and we thought it would be the perfect gift for my mom for mother's day also.


I didn't have to search how to since Cole had just did it in class and gave me a play by play but I did find the steps on How to Do Things also.


What you Need:
Wine Bottle or fun shaped Bottle (emptied ... YUP you get to have a drink first)
Masking Tape
Shoe Polish
Modge Podge

Peel off the label off your bottle (first it must be emptied so you can have a nice glass of wine or you can use a alcohol bottle so pour yourself a shot or two).  I'm on my diet so sadly I didn't get to have a drink.  I took a picture of the boys and uploaded to PicMonkey.  I changed the color to sephia, added a heart and the words  We Love Monnie.  I cut the photo down to size and with the sticky of the label left over I placed the picture on the bottle.  I made it look almost like a wine label.  I put some masking tape around the picture to make sure it was secure.  I then got Caden and myself to work on tearing up the masking tape.  We made different sizes and shapes to give the vase some depth.  Cole covered the whole bottle including the bottom and the lip of the bottle.  This took about an 45 minutes to an hour to do.  Once done we took the shoe polish and went over the bottle.  We took 2 coats of shoe polish to make sure we covered every inch (be-careful around the picture).   Once the polish has dried, take some modpodge and cover everything.  You can make two coats of this if you would like.  This will seal the bottle and give it a pretty shine.  

I added some fake flowers to give it a pop of color and gave it to my mom.  It is perfect for any kitchen, especially if it's a family that loves wine it will fit in perfect.


 Don't forget to see the parties I link up to HERE.

Tuesday, May 27, 2014

Coffee Lovers Gift ... Starbucks Coffee with Coffee Cup Card

Next on my list to do was a gift for my boss.  When I stayed at their house I noticed he was a big coffee drink like me.  He has a long drive to work so needs coffee on the go.  He was using a small popcorn cup (that I had given to them in a movie themed basket) for his coffee.  When I was at my bestie's house for a party she showed me these Starbuck's Cups that are plastic.  PERFECT for traveling, and Starbucks sells them for $1 YES you heard me right!!


For Card:
Card Stock
Coffee Sleeve
Printer
Scissors

I found this template on Heart on Homestead, this was the only place I found a free template so many other's charge please stop by and thank her.  This is super easy, I printed on heavy cardstock.  Before printing I copied into a word document and then added a little message.  "Brewing up" Birthday Wishes Just for You!  Cut out the 2 parts, the top of the lip you fold in half I added a little glue to make it stay down.  I took a sleeve and cut it down to size and and glued it on top of the paper.  Glue your two cup pieces down make sure you only glue on the side and bottom so you can slide the lid and message piece into the cup.


What you Need:
Starbucks Coffee (I bought at the grocery store on sale)
Starbucks Plastic Cups with Lid ($1 Each Starbucks)
Coffee Sleeves (Free at Starbucks - Grab a handful)

Put this all together in a basket or in a Starbucks bag with a bow on the handle.


 Don't forget to see the parties I link up to HERE.

Monday, May 26, 2014

It's a Cake Thing ... Owl Diaper Cake

My coworker was having a baby girl and I wanted to make her a gift, since she lives on the other side of the US I wanted to find a diaper cake I could ship easily.  I saw several ideas for an Owl Cake on Pinterest.  I found a great video on Thom's Craft and good step by step on Book Worm Cook.

  • 36 Diapers (New Born size used in the example)
  • 1 Roll of Ribbon (1-inch Wide, )
  • 1 Roll of Ribbon (1/4 Inch wide)
  • 2 Cloth Flowers
  • 1 baby Wash Cloth
  • 1 Pair of Baby Socks
  • 1 Baby Bib
  • 1 Receiving Blanket
  • 2 pipe cleaners
  • Some Rubber Bands
  • Scissors
  • Tape
1. Make the body by packing the diapers in a circular shape (around 25 to 30 diapers used). I used my large cake pan. Pack as tightly as possible. Secure with a rubber band.
2. Make two smaller circles for the eyes, securing with rubber band (around 6 diapers used). 
3. Wrap a wide ribbon around the body to cover the elastic, use tape to secure.
4. Cover the body with the bib. Fold a washcloth in a triangular shape and tuck into the space between the eyes for the beak (I used an extra pair of socks I had).
5. Fold the receiving blanket to the width of the diapers. Use it to cover the top of the owl’s head. The ends should drape down for the wings.
6. Tie the smaller ribbon around the neck (under the bib).7. Tuck socks under the bias tape on the owl’s head for ears.
7. Take a pipe cleaner fold in half, insert a sock.  Tuck the ends of the pipe cleaner into the top of the diapers for the eyebrows.
8. Cut the wire off the flowers to be long enough to stick into the middle of one of the small roll of diapers (the eyes).

Hope you all had a great weekend and Thanked a Military person.

Don't forget to see the parties I link up to HERE.

Thursday, May 22, 2014

It's Getting Close to D-Day ... Swimsuit Season

As we are all aware it's getting hotter so we must wear shorts or we may fry.  I'm still sticking to my thin cotton pants.  Until I can get myself to put a pair of shorts on.  I'm trying real hard to stick to a strict diet and using the Omni Diet Drops.  Wish me luck!  I'm reaching for my goal to be 30lbs down by Caden's party in July.  I'm down 5 lbs so far with my other diet and this new diet I just started.  I'll keep you posted on it!

But since it's Friday It's time for a Funny!

Have a GREAT weekend!

Wednesday, May 21, 2014

Teacher Appreciation Gift ... Summer Bucket

Last on my list to do for the Teachers was suggested by the PTF to do a summer themed gift.  I found a cool idea for a Teacher Relaxation Bucket on Coffee Cups and Crayons.  I took her idea and ran with it!

What you need:
Bucket
Water Bottle
Flip Flops
Book
Straws w/ Flamingo

You can find most of these items at the Dollar Tree.  I ran out of time and would have added a fun printable, but as usual I ran out of time.  Add all your items to the bucket (easy carrying case).


Don't forget to see the parties I link up to HERE.

Tuesday, May 20, 2014

Teacher Appreciation Gift ... You Deserve a Hand

Next on the teacher appreciation gift we made was for Caden's teacher for the homemade card. I've seen this all over Pinterest, I can't find the original source for this so if you know please let me know.  

What you need:
Card Stock (Flesh Color if possible)
Lotion (Travel Size)
Scissors
Glue

Trace your kids hands on the card stock.  Cut out the hands and write your the message You deserve a Hand.  I wrote it in pencil and had Caden trace it with a pen and then erased the pencil.  I wrapped the hands around the lotion bottle and glued the sides to hold it together.


Don't forget to see the parties I link up to HERE.

Monday, May 19, 2014

Teacher Appreciation Gift ... You're Awesome to the Core!

Onto our next Teacher gift, another one that would be perfect any time of year even the end of the year gift.  I found a great post on Shaken Together for Fruit Filled Teacher's Gifts.  I used the Awesome to the Core one.

The PTF suggested fresh fruit for one of the days and this worked perfect.  So simple but so awesome!


What you need:
Apple
Cupcake Liner
Clear Bag
Ribbon
Card Stock

Wash your apple (I know it seems to be a no brainer but just in case).  Dry off apple, put the apple in a cupcake liner.  I used one that was a shiny silver to give it a little pop.  Put in a clear Bag, I find mine at the Dollar Tree 25 pack for $1.  They are the best I've come across so far.  I had some left over apple ribbon from a gift I made for a teacher last year.  I wanted to jazz up the printable a little so I took her idea and added on.  I did a Google Search for Clipart Apples and copied it into word document.  Added the wording and printed onto a 5x7 cardstock paper I had on hand.  I punched a hole with my hole punch and added to the ribbon on the bag.


Take less than 5 minutes to make but so cute!

Don't forget to see the parties I link up to HERE.

Sunday, May 18, 2014

Teacher Appreciation Gift ... Thanks A Latte

Last week was Teacher Appreciation week, but I wanted to finish my post of the Minecraft party so I had to share what we did for the teachers.  The PTF gave suggestions for each day, one day was a handmade card.  I found this really cool FREE printable for Thanks a Latte on Eighteen 25.  As you know I love these amazing bloggers that make these items and give free printable's, in my world they are rockstars!!


What you Need:
White Card Stock
Coffee Gift Card
Coffee Sleeve
Ribbon
Hot Glue Gun (or Glue)

I picked up a Starbucks giftcard while I was grocery shopping so I had to use a sleeve I picked up from target.  I would have liked to use a Starbucks one, but I didn't have time to run there so I used what was handy.  You know me I love my hot glue gun, you can use regular glue but I'm all about my glue gun.  

Print the card, if you have 5x7 paper print on that if not use a regular sheet and cut yourself. If you know me I'm all about no waste and I had some 5x7 paper on hand (you can even use 4x6).  I cut the coffee sleeve in half and trimmed to fit on the card.  I should have trimmed a little more now looking at it, but it turned out pretty cute!  I took the hot glue and went along the bottom and the side and attached to the card.  She tied her's with twine I had some green ribbon left over from a previous project and used it :).  Wrap the ribbon around twice so you can tie in front.  When all dry insert the gift card in the top of the sleeve.  Have your little one write their name on the bottom next to from.


Quick and Easy but so worth it!  Cole's teacher came up to me and said her and her boyfriend thought it was the cutest card she had ever received!!

Don't forget to see the parties I link up to HERE.

Thursday, May 15, 2014

Happy Friday

Wow it's Friday!  I happy to say it will be a slow weekend for me, well that is after I finish the princess castle Cake ... LOL.  I really have no baking to do, but I'm sure I will find something to do .. lol.  Hopefully kick this stupid cold that has been hanging on to me!

Had to share the fun flower cookies I made for my friend for Mother's day.  I used my go to for Sugar Cookie recipe.  I then made 1/4 of the batch pink and 3/4 of the batch yellow (which came out more orange).  I used my cupcake middle cutter (takes the middle out of cupcakes so you can add jams etc) and cut the centers out of the cookies.  Used that same tool to make my centers.  I had a few circles left at the end and baked those too!  Of course served with a tub of my favorite Sturdy Buttercream Frosting.


On the diet side I've been sticking to it, it's been SLOW verse last time loosing.  It's frustrating but I'm sticking with it.  As of Sunday I was down 3.8 lbs.  I'm going to try the Omni drops starting tomorrow.  I have a friend who sells it and has lost 25 lbs in 3 weeks!  So I leave you with diet humor!


Have a Happy Weekend!


Wednesday, May 14, 2014

Just a Few Cakes ...

Last week was a crazy busy week for me.  I was just finishing up Cole's Minecraft party and then I signed myself up to make a few more ... LOL.  Recipes to come and how to but I thought for today I will just share a few pictures.

Last week I did: 
Minecraft Creeper Cake for Cole's Party (you saw that picture last week)
Monkey Cake for the boys school Cake Walk
Pirate Ship Cake for a charity that brings birthdays to homeless kids
Zebra Print inside w/ MM Age for a friends mom
Strawberry Brownie Shortcake w/ Caramel drizzle


On the list this week to do:

Owl Diaper Cake for my coworker
Princess Castle Cake for another homeless kids' birthday party

Thom's Mom Owl Cake - on my list to do

Princess Castle Cake found on Single Mormon Mommy
Castle in the Clouds Birthday Cake

Wish me Luck! 
I'll share the recipes etc soon!

Tuesday, May 13, 2014

Minecraft Birthday Party ... Treat Bags with Thank You Cards

And we end the Minecraft invasion at my house with the Treat Bags and Thank You Cards! As many of you know I hate treat bags and usually don't do them.  Really I don't want to take home a crap load of candy or dollar tree toys.  Usually I just skip them but the last two parties I've done I did make them with items we made or something with the theme.


What You Need:
Creeper Treat Bag (click for the tutorial of the ones we made)
Glow Sticks (Dollar Store 5pk $1, 1 each per bag)
Creeper Loom Bracelet's (see below on step by step pics)
Minecraft Gelly Bracelet's (bought 4 packs of 5 on Meritline $3.99 a pk)
Minecraft Perler Bead Necklaces (click for tutorial on how to make)
Steve or Creeper Mini Candy Bars (see below)
Minecraft CD (click for tutorial on how to make)


Add one of each or more to each bag!  Print a Thank you card.  I attached by using my hole punch and tying with ribbon I found at Michael's that looked like a minecraft theme.


I found this really cool free printable Mini Candy Bar wraps on Keeping it Simple.  She used her's for a Valentine but they were simple to make and had no wording so they worked perfect for the gift bags.


I also tried my hand and Rainbow Loom Bracelets.  I ended up having to YouTube a video on how to do, yes I had to be schooled by probably a 8 year old ... lol.  Caden ended up becoming a pro at it and was able to make almost all of them for me.  He then had to start making them for his friends in school too .. lol.


I've created a google Drive with everything I've done printable etc, let me know if you want any of them and I'll send them over.

And when you're ready to head out
Put them in a tub and carry to the party!

Monday, May 12, 2014

Minecraft Birthday Party ... Potion of Healing (Water Bottle Wraps)

Tomorrow I will wrap up this party with the party bags and what we put in, but today I will show another EASY item that goes with the theme and gives a little jazz to a water bottle.

I found these water bottle free printable wraps on Catch My Party.  You must check out their site they have TONS of free printable's for every party theme you can think of.


What you need:
Water Bottles
Hot Glue Gun
White Card Stock
Printer
Scissors

Peel off the water bottle label. Print the free printable above onto cardstock (You can use white paper but card stock gives you a little extra strength.  You can take a pair of scissors to cut, I use my scrapbook paper cutter.  Take a little hot glue on the water bottle to put the end of the water bottle wrap down.  Wrap the paper around the water bottle and glue the other end of the paper to the bottle.

Sunday, May 11, 2014

Minecraft Birthday Party ... Food and Food Tents

Now on to the Food for the Minecraft party!  I found these really cool Food Tents on Catch My Party that was a FREE download.  This link also has other FREE printables for your party!  For the extra food tents I needed I googled Dirt Block and made my own tents using the Minecraft font and googling the pictures I needed.  Let me know if you need any help and I'll send mine over I created.

What You Need:
Card Stock
Printer

Food:
Bread = Mini Pigs in a Blanket

Carrots = Cheese Puffs & Carrots

Coal = Oreo Popcorn

Cookies using a Minecraft Cookie Cutter
I used a Rolled Sugar Choc Chip Cookie found on Sugar Bakers


 Diamonds = Hersey Kisses

Fish = Swedish Fish

Gold = Gold Hersey Mini Bars

Golden Apples
I tried Caramel Apples they were a FAIL
So I cut up apples and served the left over caramel

Sadly were a GOOEY mess!


Melon = Watermelon

Redstones = Strawberries

Slime Balls = Green Grapes

Sticks = Pretzel Sticks

TNT = Red Licorce
I used a free TNT printable on MC Paper Craft to wrap the Licorice


A wrap of the food:


Don't forget to see the parties I link up to HERE.


Minecraft Party Items Done:
3D Minecraft Invitation

Created by MyFitnessPal - Nutrition Facts For Foods

Thank You to My Wonderful Sponsors!!!

1800flowers
Baby Pop
BzzAgent
cafe Press
CSN
Easy Lunch Boxes
Faith Words
Glasses USA
Great Wolf Lodge
Hachette
Jump Start
My Baby Clothes Boutique
My Blog Spark
Ouchies
Pleasures.com
red envelope
She Speaks

tote bags
Strap Doctor
You Can Make This

Total Pageviews

Awards I've been Given! You Really Love Me!! (Yes my best Oscar Speech)

Photobucket
Photobucket
Photobucket
Photobucket
Photobucket
Photobucket
Photobucket
Photobucket
Photobucket
friendhip2 from Anissa
passoinate-blogger-award (Heidi @ Tried & True Cooking)
You're a Superstar Blogger
you-dont-say-post - Kristie Notes
Annisa (Over the top)
Jessica Mommy Needs Coffee (Lovely)
Annissa (Queen Award)
Your Blog is Fabulous
Best Comedic Performance
Splash Award
Best Blog Award
Dragon's Loyalty Award
Photobucket
The Heartfelt Award
Daffy Commenter Award
 
Pin It button on image hover