Protected by Copyscape Web Plagiarism Check

Sunday, December 6, 2015

TMNT Cupcake Toppers (Modeling Chocolate)

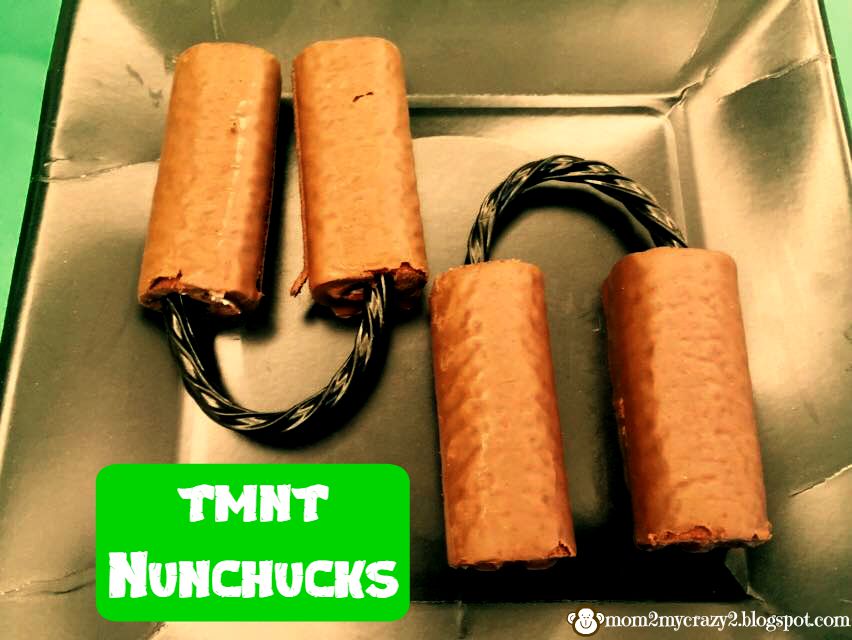
I've made a few different versions of TMNT (Teenage Mutant Ninja Turtles), I like to make different versions when I make them. I signed up for another Birthday Dreams cake delivery for a sweet little homeless boy. Please look up this charity with the holiday's coming less people donate and they could use any donations you can give.


What you need:
Modeling Chocolate (Green, Red, Orange, Purple and Blue) - see recipe below
Circle cookie cutter
TMNT Cookie Cutter (Bought on Ebay)

Roll out your green modeling chocolate, I like mine to be on the thick side. I then cut out circle's for the face's (I made 24 total). I set these aside on some parchment paper and got to work on the mask. I made all 4 characters so I needed 6 mask total of each color. I rolled out each color and used the cookie cutter using only the mask cutter. I then dabbed a little water to the back of mask and attached to the green circle. I then used mouth cutter to make the smirk. NOW you can do this with a tooth pick also. I didn't like the rest of the cutter when I used it before so I use parts of it that I like.

I let them sit out a while to harden up then attach to the top of my cupcakes! And your done!

For those who haven't seen my post about Modeling Chocolate:

Modeling Chocolate
12oz Candy Melts
1/4 Cup light corn Syrup

Melt your Candy Melts in microwave (mine takes about 2 minutes). Stir them to become smooth and add the corn syrup.  It will become thick and form a ball.  Wrap in plastic wrap and let it sit out and dry.  Takes a few hours or over night is best. (Alexis note: I found to roll this out use a little powder sugar (like you would do with flour), also you have to kneed it a little like you would dough to make it easy to roll out).


Thanks for Stopping by!
Don't forget to see the parties I link up to HERE.

For a fun exta I also tried the rice in the cupcake pan for baking!
I must say this trick worked great (I've done it several times since), the rice soaks up any grease the you get when you use from scratch cupcake recipe!


Sunday, August 23, 2015

TMNT Birthday .. Inside Pizza Box Favors

And we finally end the TMNT party with the party favors for the guest who attended the party. We had a great turn out for Caden's party, thankfully I made 20 favors and we had just enough this year (previous year we had about 15 kids show up that didn't RSVP and I ran out of the minion bags).


What you Need:
TMNT Stickers (Dollar Tree 10pk $1)
TMNT Crayons (Dollar Tree 3pk $1)
TMNT Pencils (Dollar Tree 6pk $1)
TMNT Temp Tattoos (Dollar Tree 24pk $1)
TMNT Fruit Roll Ups (Grocery Store 10pk $2.50)
TMNT Fruit Snacks (Grocery Store 10pk $2.50)
TMNT Paper Mask (Amazon 8pk $3.99)
TMNT Ooze (Click link for my tutorial to make)
TMNT Perler Beads (Click link for my tutorial to make)


Other Idea's for food and other tips are:

Put Pizza out with a sign: Radical Pizza


Make Green Jello in the mini cups and put a sign Toxic Slime 

Don't want greasy cupcake bottoms put rice in pan before you put in liner!

Thanks for Stopping by!
Don't forget to see the parties I link up to HERE.

Tuesday, August 18, 2015

TMNT Ooze (Make Slime / Gak Recipe)

And of course a party full of boys you need Slime Right??? When I was young Nickelodeon had a show with Marc Summers (He's now a producer on Food Network) called Double Dare, the kids would get this green slime thing all over them. I've been seeing several post on Pinterest on how to make Slime / Gak and I thought how perfect for a TMNT themed party. I was not alone in this thought and found a TON of people had this same idea. I used One Artsy Mama's Recipe. Now I needed about 20 little containers so I tripled the recipe, I wish I did about 4 or maybe 5 times the recipe to give the kids more but it can get a bit spendy.


What you Need:
Elmer’s Glue – either two small 4 oz bottles, or one large 7 oz
1 Teaspoon of Borax – found in the laundry section
Green Food Coloring (I used AmeriColor Food Gel)
1/2 Cup Warm Water
Large Mixing Bowl and Spoon
Air-tight Container (I picked up little jello shot containers at Dollar Tree)
Sticker paper or adhesive labels (I used paper and glued on)

Step 1: Dump your glue bottles into the large mixing bowl.  
Step 2: Fill the empty glue bottles with water, swish it around, and pour into the bowl with the glue.
Step 3: Stir well and add food coloring to create desired color. 
Step 4: In a separate container, spoon 1 tsp of borax into 1/2 cup warm water and stir. 
Step 5: SLOWLY start to add the water to the glue mixture-make sure none of the borax granules get into the mixture. Add a little, mix with your hands, add a little, mix with your hands. It starts to form quickly, so don’t add a lot of water all at once. Keep mixing with your hands until it isn’t sticky anymore.
Step 6: Package 
Step 7: Add label. I found my label for free but now I can't find the link (here is the link of the ones that look like what I used). I printed on copy paper and then used my circle cutter to cut them out. I put a dab of glue on the back and added to the top of the container.


Thanks for Stopping by!
Don't forget to see the parties I link up to HERE.

Monday, August 17, 2015

TMNT Perler Beads

As you know I'm a little obsessed with themed parties and of course on this quest of themed parties I came across perler beads! I have done it now for the last few parties, they take a LOT of time to make them but I just love them! Thankfully my boys could be a little OCD like me and at times they will sit and make these for me for the party goers. I did a google search and found SEVERAL ideas on different ways to do the TMNT Characters, the logo and food. I just googled and then blew up the photos. The boys and I then counted the rows and made our designs. Sorry no real step by step to make these, I would suggest doing like I did printing the picture and then copying on your perler board.


What you Need:
Perler Beads (Colors needed for the character etc)
Perler Board
Perler Paper (like a wax paper)
Hot Iron

I use a medium board and map out what I'm making. This time I made a few different heads (4 characters), Pizza and TMNT logo. I did find a sewer lid also but it was too large for the board I had. We put one character and a logo or pizza in each pizza box favor that each kid got to take home.

Once you get the design you like, you put the perler paper on top. I have got it down when I set the iron on top of the paper I set a timer on my phone for 90 seconds. If I do longer it melts too much and the board gets messed up. I have found that you can warp the board if you heat it up too much. I make so many of these each party that I have to by new boards each time. Thankfully they are not too expensive.

Here is a step by step if you have not done a perler bead before:

  1. Working on a flat surface, create your design by placing beads one by one on a Perler peg board.
  2. Preheat a dry household iron to the medium setting. When carrying the bead design to the iron, be careful not to tip or bump the beads from the peg board! Cover the beads with the ironing paper. Keeping the iron level, gently iron the beads in a circular motion for about 10 seconds** to fuse the beads evenly. When ironed properly, the beads will still have an open center. If you are working on a 3-D project, DO NOT OVER-IRON the beads as it will make the centers of the beads close and can make assembly more challenging.
  3. Once the design is cool, peel off the ironing paper. Lift your design from the peg board and flip the design over onto your ironing surface. Cover it with the ironing paper and iron the other side to fuse it evenly. Your peg board and ironing paper are reusable.
This is how I do it I print out and then plan out my boards.
The boys like it this way to they can see the picture and duplicate.


Last years Perler Beads and this years
Thanks for Stopping by!
Don't forget to see the parties I link up to HERE.

Sunday, August 16, 2015

TMNT Pizza Box Favors

I have a thing about giving crap gifts from dollar stores that people throw out or a bunch of candy. I hate buying things that just get thrown out or just hype kids up. I love to find fun ways to give gifts for kids to take away with them. 

For Caden's TMNT party I wanted to do something different then I have done before. I saw plenty of ideas on bags to make on Pinterest then I was on Etsy and found several idea's for Pizza Boxes! I called around to Pizza place to buy boxes and almost died at the cost, at $1.50 a box for the 20 I needed it would be $30.00. It cost me LESS to buy a huge pack on Amazon and store the later for something instead of buying one at a time at a Pizza place.


I went onto Etsy and found a ton of Pizza Box ideas a LOT of them looked a bit childish and since Caden was turning 8 I didn't want to go that way. I found this Pizza Box on Bailey Bunch Invites. They printed as a PDF for a 7x7 pizza box she has the instant download for $9.99. NOW this are NON-personalized. I paid and downloaded the PDF and Saved as PDF I saved in Word and then using TMNT FREE Font I downloaded I added Wording Caden's 8th Bday in the banner. You don't have to do that or you can pay the $12.99 or so for a personalized one, i'm cheap and find ways to do it myself ;).

What you Need:
Printer
Craft Glue
Scissors
White Paper (Regular is fine you could do Card Stock but a waste of money I think)
Image Printed

After I doctored up the wording and printed on plan copy paper since I figured most would throw away I didn't want to waste the money on card stock paper. I added the top with the wording I added. In the download you get 3 sides for your pizza box (1 front and 2 sides). I attached with craft glue and bam done! I have to say the faces on the kids when they got this was priceless NOW not as big as when they got the nun-chuck pool noodles but still they thought this was so cool!!!  


I was so excited this was my favorite Favor Box as to date!

It was a little time consuming making 20 of these BUT not as long as some of the other's I've made in the past. Like last year's minion Bags those took a lot of time cutting out and gluing. 


Thanks for Stopping by!
Don't forget to see the parties I link up to HERE.

Tuesday, August 11, 2015

TMNT Party ... Water Bottle Wraps

Next on the party list was an easy way to make water bottle's part of theme. I like to do this with all parties. I like to have an option beside punch and water bottles are so inexpensive and adding a wrap is so easy. I went on a google search and found these Free Printables on Hale Grafx. They have several different ones you can pick from.


What you need:
Water bottles
White Paper
Scissors
Hot glue gun

I don't waste the card stock for these since I usually have them chilling in ice and they get wet. You can if you keep them in a fridge but I think plain paper does just as nice. Print out the template, you can either use scissors or a paper cutter. I was in a hurry so I used scissors. I removed the water bottle wrapper that it came with. I then added a dot of hot glue to  my TMNT label and attached to the water bottle.


Thanks for Stopping by!
Don't forget to see the parties I link up to HERE.

Monday, August 10, 2015

TMNT Drinking Cups

The day of the party I was running around like a nut, usually I have weeks to plan for parties and do the goodies. This time I had my mom's surprise 60th and that ate up a lot of my free time. So the day of the party I wanted a fun cup for the kids and threw these together quickly. If I had more time they would have been more detailed with mouth's etc but cute enough for what I needed. 


What you Need:

Green Cups (Dollar Tree 10 / $1)
Poster Board (Blue, Red, Purple & Orange $1 large sheet)
Google Eyes (Bag $1)
Craft Glue

I only did 2 colors since I was running late this day but you could do all 4 character masks. Cut the poster board for your mask, I made mine a little wide since I used larger google eyes. I used craft glue to attach the poster board then the google eyes in the center of mask. You can add mouth's if you have time.


Thanks for Stopping by!
Don't forget to see the parties I link up to HERE.

Sunday, August 9, 2015

TMNT Party Food Bowl (From Dollar Tree)

For the TMNT party I needed something fun to put the chips etc into. I saw several ideas on Pinterest using crepe paper to poster board. I then googled tmnt mask and copied them into a word doc and then cut out and bam ready to add to a dollar tree bowl.


What you Need:
Green Dollar Tree Bowl (pick the shape you want)
Printer
White Card Stock
Scissors
Craft Glue

I tried to go to the website to download the mask but had a problem with the site, so I googled and went to images to find what I wanted. I then right clicked and copied TMNT Mask Image I liked best and added to a word doc. I printed on regular white paper, but next time I would print on card stock next time it just is a preference. I cut out and then added some craft glue to attach to the front of the bowl I bought. I made only two for the party but you can do all four mask if you would like. Fun way to put chips etc out for the kids.


Thanks for Stopping by!
Don't forget to see the parties I link up to HERE.

Tuesday, August 4, 2015

TMNT Punch "Sewer Ooze" (2 ingredients)

I always like to have an easy punch for the kids that way they can fill up by themselves while I'm running around like a nut. I always try to do a punch with 2 or 3 ingredients only that way I'm not spending a ton of money and I'm not having some complex recipe that I have to fill up.


What you Need:
Green fruit drink (I picked up Hawaiian Punch)
Sprite (Or Generic version like I did)

Mix the two together in your punch container. You can always add more sprite if the juice is a little strong.  It was the perfect color and the kids loved it!

Thanks for Stopping by!
Don't forget to see the parties I link up to HERE.

Monday, August 3, 2015

TMNT Nunchucks Tutorials - Made from Pool Noodles

Yesterday I showed you the edible Nunchucks for the party. Today I show you the cool Nunchucks made from Pool Noodles. As you know I love a themed party and using pool noodles is also one of my favorite things to do. A previous year party we did Light Saber's for a Star Wars Party. I found several site's showing you how to do the Nunchucks but the best one was on Capital B, she did a great tutorial.


You'll need:
Pool Noodle (Makes 2 nunchucks per noodle)
3/4" PVC Plugs
1 yard parachute cord (or similar)
sharp knife / scissors
drill
match or lighter
super glue 

Cutting pool noodle (I cut mine to make 4 piece's per noodle). You can measure or you can fold it half then half again then mark and cut with scissors.  For the cord part I just eyeballed it, you can get measure it all but I was making 24 of these suckers so it was a let's get this done mission. So my ends weren't perfect, I also had my 11 year old cutting so I let it be (I had to put my OCD aside - since it took us until 11p the night before the party).

Then I drilled a hole down through the middle of the PVC plugs. I used a 9/64 drill bit, I did the same as her and tried different bits to find the right one for the cord to go through. Shhh I may have press to hard and broke one of my husbands bits also :).

I picked my cord up at Hobby Lobby (I found it at most craft stores). Melt the ends to get it threaded through the PVC plug. I used a BBQ lighter, waited a few seconds then my fingers form it to a point. Thread the cord through the plugs and tie knots. Make sure to have your knot sticking out the end, not tucked inside the plug (I noticed I did mine backwards vs her's, it worked but it's up to you). 

Use super glue to spread around the base part of the plugs, then tucked them into the hole of the pool noodle. It is snug even without the super glue, but I to make sure they stayed I added glue inside before I put the plug in the noodle hole. 

To make them look more like Nunchucks I added some black electrical tape to the ends. Wrap it around as straight as you can.


Thanks for Stopping by!
Don't forget to see the parties I link up to HERE.

Some fun pictures of the party goes and their Nunchucks!

Sunday, August 2, 2015

TMNT Party ... Nunchucks (Swiss Rolls)

Back to the TMNT Party! I'm sorry I was absent all of last week, for those who follow me on FB saw my husband planned a surprise trip to San Diego last week. I got home Thursday and I'm still playing catch up .. lol.

This was a quick an easy themed food item I had for the party! This was one that was so simple I had a helper put them together at the party.


What you need
Swiss Rolls
Black Licorice

NOW it was very hot so some of the chocolate of our swiss rolls came off, next time I may pop them in the freezer to firm them up. Unwrap your swiss rolls (2 per pack), connect the 2 rolls with a piece of licorice. Bam your done! Place on a platter like nunchucks!


Thanks for Stopping by!
Don't forget to see the parties I link up to HERE.

Tuesday, July 21, 2015

TMNT Cookie's

For Caden's party I wanted to make cookies I had grand ideas of making sugar cookies and then decorating them with royal icing with the different head bands etc. WELL the party date came upon me and I ditched that idea and went for green cookies ... lol.  I found this sandwich cutter on Amazon that worked perfect for cookies.


What you Need:
Sugar Cookie Recipe (my fav is below)

Color the sugar cookie recipe to the right shade of green. I like thick cookies which when using a cutter that has lot's of design helps get them out of the cutter! I did have a little problem with the sides of the mask coming out but I just reattached them after I shook them out of the cutter :).


INGREDIENTS:
1 1/2 cups butter, softened
2 cups white sugar
4 eggs
1 teaspoon vanilla extract
5 cups all-purpose flour
2 teaspoons baking powder
1 teaspoon salt
DIRECTIONS:
1.In a large bowl, cream together butter and sugar until smooth. Beat in eggs and vanilla. Stir in the flour, baking powder, and salt. Cover, and chill dough for at least one hour (or overnight).
2.Preheat oven to 400 degrees F (200 degrees C). Roll out dough on floured surface 1/4 to 1/2 inch thick. Cut into shapes with any cookie cutter. Place cookies 1 inch apart on ungreased cookie sheets.
3.Bake 6 to 8 minutes in preheated oven. Cool completely.

Thanks for Stopping by!
Don't forget to see the parties I link up to HERE.

Monday, July 20, 2015

TMNT Cupcake Toppers (Made from Modeling Chocolate)

Yesterday I showed you the Mountain Dew Cupcakes I made for the party, today is what went on top of the cupcakes. I've become a huge fan of modeling chocolate, so easy to work with and it holds up to the temperatures we've been having lately. And who doesn't LOVE some chocolate and shaped into something amazing!

I just kind of eyeballed this and ran with it! 


What you need:
Modeling Chocolate (Green, Red, Orange, Purple and Blue) - see recipe below
Candy Eyeballs
Circle cookie cutter
Square cookie cutter
Knife

Roll out your green modeling chocolate, I like mine to be on the thick side. I then cut out circle's for the face's (I made 24 total). I set these aside on some parchment paper and got to work on the mask. I made all 4 characters so I needed 6 mask total. I rolled out each color then I took a square cookie cutter. I cut each square in half and then using my fingers shaped them into mask. Each one was a little different do to this but I loved they had character. I then took 2 Wilton Candy Eyeballs and added to the mask (use a little water as glue). I then dabbed a little water to the back of mask and attached to the green circle. I had previous bought a TMNT cutter (that I wasn't impressed with) but I liked the mouth piece. NOW you can do this with a tooth pick also.

I let them sit out a while to harden up then attach to the top of my cupcakes! And your done!


For those who haven't seen my post about Modeling Chocolate:

Modeling Chocolate
12oz Candy Melts
1/4 Cup light corn Syrup

Melt your Candy Melts in microwave (mine takes about 2 minutes). Stir them to become smooth and add the corn syrup.  It will become thick and form a ball.  Wrap in plastic wrap and let it sit out and dry.  Takes a few hours or over night is best. (Alexis note: I found to roll this out use a little powder sugar (like you would do with flour), also you have to kneed it a little like you would dough to make it easy to roll out).


Thanks for Stopping by!
Don't forget to see the parties I link up to HERE.

Created by MyFitnessPal - Nutrition Facts For Foods

Thank You to My Wonderful Sponsors!!!

1800flowers
Baby Pop
BzzAgent
cafe Press
CSN
Easy Lunch Boxes
Faith Words
Glasses USA
Great Wolf Lodge
Hachette
Jump Start
My Baby Clothes Boutique
My Blog Spark
Ouchies
Pleasures.com
red envelope
She Speaks

tote bags
Strap Doctor
You Can Make This

Total Pageviews

Awards I've been Given! You Really Love Me!! (Yes my best Oscar Speech)

Photobucket
Photobucket
Photobucket
Photobucket
Photobucket
Photobucket
Photobucket
Photobucket
Photobucket
friendhip2 from Anissa
passoinate-blogger-award (Heidi @ Tried & True Cooking)
You're a Superstar Blogger
you-dont-say-post - Kristie Notes
Annisa (Over the top)
Jessica Mommy Needs Coffee (Lovely)
Annissa (Queen Award)
Your Blog is Fabulous
Best Comedic Performance
Splash Award
Best Blog Award
Dragon's Loyalty Award
Photobucket
The Heartfelt Award
Daffy Commenter Award
 
Pin It button on image hover