Protected by Copyscape Web Plagiarism Check

Sunday, August 31, 2014

Getting our Mexican on ... Slow Cooker Beefed-Up Enchiladas (In our case Turkeyed up)

Well why not start a new thing on my blog, Sunday Meals .. LOL.  I have a bunch of recipes post all typed up but don't have time to fit them in so they have just been sitting in my pending folder.  So why not showcase them on Sundays!  Here's another one, it may not be pretty but sometimes they aren't but they taste amazing!  Enjoy maybe you can make for your Sunday Supper!

The boys all love Mexican dishes so I'm always on the hunt for new ways to make a dish.  I found on Skinny Ms. these Slow Cooker Beefed-Up Enchiladas.  These were super simple to make and actually was yummy!  I usually don't make a recipe again or at least with in 3 months but this was such a hit with Cole I made it the following week. 


Ingredients
1 pound lean ground beef (optional, ground turkey)
1 (16 oz.) red enchilada sauce (no sugar added)
1 (4 ounce) can green chile peppers
1/2 teaspoon garlic powder
1 teaspoon cumin
1 teaspoon chili powder
1/2 teaspoon black pepper
1 1/2 cups shredded cheddar cheese, reduced fat
1 (8 oz.) container sour cream, reduced fat (optional, Greek yogurt)
6 medium whole wheat tortillas, low-sodium if possible (corn tortillas are not recommended as they tend to fall apart)


Directions
In a large skillet, cook ground beef over medium heat, breaking up while cooking. Cook beef until pink color is gone, drain off any fat.
In a medium mixing bowl, add cooked ground meat, garlic powder, cumin, chili powder, black pepper and salt to taste. Add to seasoned meat, green chile peppers, 1/2 cup of enchilada sauce, 1/2 cup sour cream and 1 cup cheese, mix well.
Place 1/2 cup beef mixture in the center of each tortilla, leave about 2” at the bottom without filling and fold up the tortilla. Continue until all tortillas are filled.
Lightly spray the bottom and sides of the slow cooker with nonstick cooking spray. Lay enchiladas seam side down in the slow cooker, add a little of the sauce to each layer as you stack them. There should be 2 layers of 3 or 3 layers of 2, depending on the size of your slow cooker.
Combine the remaining enchilada sauce and 1/2 cup sour cream. Pour over the enchiladas, cover and cook on low 3-4 hours, or until hot and bubbly. Cut between each enchilada and carefully remove, one at a time, with a large spatula. Pour liquid from slow cooker over enchiladas and sprinkle with remaining cheese. Garnish with diced tomatoes and shredded lettuce.


Give this a try I promise you'll love it!

Another super easy recipe!  Throw in crock-pot and forget about it!

What's on your menu tonight?

Don't forget to see the parties I link up to HERE.

Thursday, August 28, 2014

My Work Trip to Whistler Canada

Three weeks back I went on an amazing trip to Whistler Canada with my boss and a coworker.  It was the most amazing trip every and I was so blessed to be able to go along.

My first day started with a bump.  I went to the airport never traveling international (who knew Canada would needing me to get a passport and need me to travel international).  Well let's just say I was told to go to the wrong gate and missed my first flight.  I ended up on a later flight and missing the first nights festivities which was a real bummer.

The Hotel, My Room, Room Service
My Gift and the Star they bought me

When I arrived my boss was so sweet and meet me at my room with my gift bag from our host and took me down to have a drink.  It was so nice to sit and chat with her.  Since I live on the other side of the states we only chat via email, IM and rarely on the phone.

Our first full day there was great!  We started with a hardy breakfast and guess who sits down at the table next to me but Vicki from the OC housewives.  So I of course made it my mission to meet her ... lol.

My bosses son was signed up for Golf Lesson's during our time there so tagged along to the club to hang out.  While there we meet the cutest squirrel that is very friendly.  A worker came out and said "Eugene leave the dinning room" I almost pee'd my pants while laughing.


We all had a relaxing Swedish massage and walked around the little town next to the Hotel. We then walked to the village for dinner at 21 Steps.  I made the mistake of wearing wedges that gave me blisters .. lol.  And I totally went off the diet for dinner but it was worth every moment!

Our Second full day we did a hardy breakfast again, I swear I've never ate so much in my life. I'm sure my boss thought I never had seen food in my life ... lol.  We went on tree trek high up in the mountains.  We walked from tree to tree, it was so beautiful and you could see the zip-liners next to us.


That night our group was invited to a special dinner at the top of the mountain.  We rode up in a Gondola.  It was so beautiful!  There we were greeted by men dressed like woodsmen with ax's they were so funny. On our way back down we went with another group and we sang (well tried if we could remember some of the words) of great songs.  I'm sure we sounded like a bad karaoke bar but I was laughing the whole time! 


Our Third full day I got up and worked out before we had breakfast again (yes I ate like I had never seen food yet again). We signed up for a Jeep Tour.  The jeep took us to the top of the mountain where they had just shut down ski July 28! There was still snow up there and my bosses kids and my coworkers daughter had a snowball fight.  I forgot my glasses and my eyes are so sensitive from the eye surgery.  My coworker was so sweet and offered her glasses for me to wear. The jeep was a little scary going up the side but what an amazing view.  He pointed out things from the 2010 Olympics like the statues you find all over Whistler along with the bob sledding area. 


My boss and I went on a walk around Lost Lake, which became true to it's name and we became lost.  Thankfully we found our way out in time to make it to dinner .. lol.  I needed to burn those calories!

That night we went to the final dinner hosted which was a themed Winter Wonderland.  YES for you who know me know I'm a sucker for a theme!  LOVED it!  We walked through a tunnel that looked like an ice cave lite up.  They had a block of ice carved like a bear.  Dinner that night was sadly not one of my favs.  The dessert of course was freaking amazing!  After dinner we were led to a different room.  We were greeted by a live ice cutting show with two men and chainsaws!!  Then out popped a neon lite up transformer dude.  Then came the band and the dancing.  And my chance to stop Vicki and Brooks from the OC Housewives for a picture!

Our last full day was a lazy day, most of the group was going home (we had over 800 in our group).  We went for a walk to the farmers market, which was so fun.  The girls really wanted to see the tarot card reader.  NOW don't shake your head it was something fun to do.


My bosses daughter and coworkers daughter went bungee jumping 300feet!  YUP I stayed on the side for that one!  I was tempted as it was on my bucket list but I decided I was good.  


My coworker and her daughter left to go home and I had an evening with my boss and her kids. We walked back to the village for dinner at the 21 Steps again and I splurged BIG time. I ate pasta and had drinks and even ended with Crème brûlée.  OMGosh it was so freaking yummy!!  I will be in the gym for the rest of my life after this trip!


We had to get up early to get to the bus that took us to the airport, and I thankfully live in WA so I was home by mid day.  I had the best towncar driver pick me up at the airport. He met me at the bag claim and grabbed my bags and even had a snack for me in the car.

It was the BEST trip ever!

Have a GREAT Weekend.
We start school next week so it's going to be crazy around here!

Liebster Blog Award


Michelle at New Horizon Review's was very kind and nominated me for a Liebster Award. Thank you so much Michelle.  Here are my answers.  I would love you all to play along if you would like to answer the questions please let me know so I can stop by and say hi and read your answers.

(1) What made you start a blog?I was going through a funk and didn't know what to do.  My doctor suggested I write in a dairy.  Of course I go to the most public form of a diary a blog ... lol.

(2) What is one tip you would offer a new blogger?
Don't let the blog take you over, thinking you must do it every day.  Just be yourself and don't let the numbers take you over either.  I can get 1200 hits a day and only 2 comments. I can't say it doesn't make me sad but I gave up worrying about it.


(3) Where does your blogging inspiration come from?
Well it started out with the funny things the kids do.  Then it became more about creating and bring joy and smiles to others.  It's morphing along with me.


(4) What do you like best about blogging?
I love finding new things to make and then trying them.  I also have meet so many amazing people and even gotten to meet a few of them.


(5) Are you a morning person? Why/Why not?
YES, I love to be up 5am.  It's really quiet around here at that time and I can think without hearing "Mom .. Mom ... Mom" lol.  Plus I can get a workout in before anyone is up and it helps me put my day on track.


(6) Who has the biggest influence on you? Why?
My dad has been my rock for many years and taught me so many lessons.  My mom taught me to bake things from scratch.  My woman's group leader and ladies in my group have taught me to be a better person with my walk with God. Other Bloggers also have taught me so many cool tricks, to laugh at life and try new things.


(7) What is your favorite book?

I'm working through a series right now that I love. Lucy Stone Murder Mysteries, I love to read and don't usually read one over and over.  My all time favorite is Where the Sidewalk Ends by Shel Silverstein.  And believe it or not Green and Eggs and Ham I read as an adult for a training lesson in sales.  And it really stuck with me on never giving up to make a sale.

(8) What is the first book you remember reading?My dad read me the Hobbit and I think I took over reading it also at a young age.  I'm not sure what the first book would have been.  Maybe the Velveteen Rabbit.

(9) How do you feel about print books versus e-books?

I do love a book in book form, but now that I'm always on the go with the kids the ebook is the easiest.  I can read on my phone while the kids are in swim or sports.

(10) What is your favorite piece of furniture? Why?

For Style I would say these really cool chairs my mom bought me in a zebra print. Usually not my style but I loved the feel of them in my house.  For function it would be my new office chair Rick bought me.  Since I sit in it for 9 or so hours a day it has to be comfy.


Tuesday, August 26, 2014

Birthday Dreams ... Princess Cupcakes

I made these princess cupcakes the day before I had to leave on my Canada trip for Birthday Dreams (a great charity that brings birthday's to homeless kids).  This was BEFORE I learned my new favorite trick to make the Candy Clay.  I used fondant, what I was trying to make was actual crowns that stood up on the cupcakes.  WELL they started to crack and look like crap so I went with plan B and made them flat and look like castle's.  They are not one of my favorite cakes I've done but they did make a little girl smile.


What you Need:
Cupcakes
Frosting
Fondant
Pink Food Coloring
Pearl decorating balls

I used my Sturdy Buttercream Frosting tinted purple with some fresh blueberries in there to go with the blueberry cupcakes I made.  

I made pink fondant using the rolled buttercream fondant.  To make the peaks I used my star cutter point  I then made 4 point castles.  I added a pearl decorating ball on each point. When I added the cupcakes to the box they needed a little something special so I sprinkled some pearls ontop of the cupcake.

Cole even got into the helping mode with me!


Thanks for stopping by

Don't forget to see the parties I link up to HERE.

Monday, August 25, 2014

Birthday Dreams - Football Cupcakes

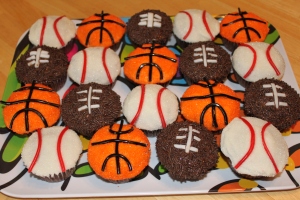
I had already signed up last week for a cake for Birthday Dreams (bringing birthday's to homeless kids).  Then I saw a SOS on Facebook that they were needing two more cakes for that week.  So I said I can do one more.  LOL just have to giggle when I took on this new volunteering gig I promised Rick I would do only one a month so I didn't overwhelm myself. Somehow I have done about one a week and loved every minute of it!  On facebook they posted it was a sports themed party, so I went on the hunt for a easy cupcake to make. Then I got the info on the party it was a football themed for a 16 YEAR old.  Change of plans! I loved the Candy Clay I made for the previous cupcakes so I decided I could make a football to go on the top of a cupcake!
What I Made
Football Cupcakes:

My first plan was to make these on
sports cupcakes 002

What you need:
Cupcake
Frosting
Candy Clay - Brown
Candy Clay - White
Brown sprinkles if you want

I had made a double batch of the Easy Chocolate Cupcake recipe so I made these chocolate also.  I frosted with my Sturdy Buttercream frosting.


Candy Clay:
12 oz (1 Bag) Candy Melts (Color you want - I use Wilton)
1/4 cup Light Corn Syrup

Melt the candy melts in your microwave (mine takes 1 minute 30 seconds). I mix it up to make the chocolate smooth and then add the corn syrup.  It's going to get thick and become a ball.  Put on a piece of plastic wrap and make it flat, wrap up and keep it in a cool place for a few hours or overnight.  I found mine had to sit overnight.  I did a bag of brown and a bag of the white.  I used a little powered sugar to roll out and took a cookie cutter to make the football shape.  I made the lines with the white just by rolling a small piece and placing on the football (see pictures below).


Place on top of the frosted cupcake, I found this clay is perfect and sturdy!  So much easier than the fondant I usually use.  I can't say it enough I'm loving this new technique!

All Boxed up and ready to go:


Thanks for stopping by

Don't forget to see the parties I link up to HERE.

Sunday, August 24, 2014

Birthday Dreams - Teenage Mutant Ninja Turtle Cupcakes

As some of you that follow me know that I love a charity called Birthday Dreams, they bring birthday's to homeless kids.  I love to bake cakes (or cupcakes for them) and I'm trying to get the word out about them.  If you don't live in the Washington area a cash donation would go a long way.  

I signed up for a Teenage Mutant Ninja Turtle party for a 6 year old at one of the rescue missions close to home.  I went on the search and goggled some ideas. I found several different cakes but I thought cupcakes would be the easier way to go. I then went on the search for a TMNT cookie cutter. I found one Ebay that was perfect, I ordered the 2 inch and the 3.5 inch.  I ended up using the 2 inch, the ONLY bad part was when I tried to cute out the mask part it was too small and didn't pop out right so I made them my own and molded them to the way I wanted and made eye holes.

My first act was to make the TMNT characters. Now usually I use my Rolled Buttercream Fondant for making characters.  But I saw a Blog Hop post for Candy Clay on Pint Sized Baker. I must admit that I had my doubt's while making this candy clay.  When I first mixed it up it was oily and not holding up and few hours later it was still not like I thought it would be.  Thankfully OVER-NIGHT and it was ready to go! Phew!!

Ingredients:
1 bag (12oz) Candy Melts (In Color you need - I use Wilton Brand)
1/4 Cup Light Corn Syrup

Dump bag of candy melts into microwave safe bowl.  Melt in microwave, my takes 1 min 30 seconds to melt. BECAREFUL not to burn, YES I've done it before and posted my disaster mess.  Once melts are melted stir in corn syrup.  I will start to form a ball (it will be greasy). Wrap in plastic wrap, press down to make it flat.  Let the candy clay sit for a few hours, mine took until overnight. In the morning it was hard and ready to go.  I found a little bit of powdered sugar on my work service made it not stick also made it easy to roll out.  I am now IN LOVE with technique and will be using from now on.

Karyn from Pint Sized Baker had a suggestion of Oil Candy Color if you need a more vibrant color.  I find Candy Melts come in almost every color you could need, but the white with a color could always be done.


Next on my list to make was the cupcakes, chocolate was requested.  I found this Super Easy Chocolate Cupcake Recipe on All Recipes.

INGREDIENTS:
3/4 cup shortening
1 2/3 cups white sugar
2 eggs
1 teaspoon vanilla extract
1 teaspoon instant coffee granules
1 pinch cayenne pepper
2 1/4 cups all-purpose flour
2/3 cup unsweetened cocoa powder
1/4 teaspoon baking powder
1/2 teaspoon baking soda
1 teaspoon salt
1 1/2 cups water
DIRECTIONS:
1.Preheat oven to 350 degrees F (175 degrees C). Grease two 12 cup muffin pans or line with 18 paper baking cups.
2.In a medium bowl, beat the shortening and sugar with an electric mixer until light and fluffy. Mix in the eggs, one at a time, then stir in vanilla, instant coffee and cayenne pepper. Combine the flour, cocoa, baking powder, baking soda and salt; stir into the batter, alternating with the water, just until blended. Spoon the batter into the prepared cups, dividing evenly.
3.Bake in the preheated oven until the tops spring back when lightly pressed, 20 to 25 minutes. Cool in the pan set over a wire rack. When cool, arrange the cupcakes on a serving platter and frost as desired.
Last thing to do was to make the cupcakes come together.  After the cupcakes had cooled, I frosted them with my go to Sturdy Buttercream frosting.  Then I topped with my TMNT Characters.
Need:
Cupcakes
Frosting
TMNT Cookie Cutter (2 inch fit the best of cupcakes)
Candy Clay - Green
Candy Clay - Orange
Candy Clay - Blue
Candy Clay - Purple

After Candy Clay has set up (mine took overnight), roll it out a little powdered sugar helps the sticking.  I found after you unwrap the clay you have to mold it into a ball then roll it out for best use.  Take the face cookie cutter to cut out the faces, I made 24 of them one for each headache.  NOW I tried to use the mask cutter but it was so small that the mask wouldn't pop out right. So I made my own mask by rolling out a small rectangle.  I form one end to look like a mask flapping int he wind.  I took a pick and made eye holes.  I took the mouth cutter to make the mouth's on each face.  The Candy Clay held up so great better than any fondant I've used.  They went on top of the cupcakes perfectly!  Did I say how much I love this technique.


All Boxed up and ready to go:

Thanks for stopping by

Don't forget to see the parties I link up to HERE.

Saturday, August 23, 2014

Pasta Palooza .... Crockpot Cheesy Chicken Spaghetti

Happy Sunday!  I usually don't post on the weekends, but I had this typed up and ready to go so why not share a warm meal that maybe you want to make for this Sunday Supper!

So technically mine is not spaghetti, but I do like I always do when I like a recipe but don't have exactly what I need on hand.  I do the next best thing, fake it until you make it!  So I thought it would be fun to use the spiral noodles I had in the pantry.  The boys could have cared less it had chicken, cheese and noodles and it was put in front of them ... hehe!   I found this great recipe on Cooking with Kim.


Ingredients:
16 oz. dry spaghetti, cooked
1 lb. Velveeta Light (2%)Cheese
2 cups cooked, chopped chicken (I use white meat only)
1 can 98% FF cream of mushroom soup
1 can 98% FF cream of chicken soup
1 can of petite diced tomotoes
1 4oz. can of mild green chilies
4 oz can mushroom stems & pieces, drained
1/2 cup water
1 small onion, diced--or less, to taste
salt & pepper to taste

Spray slow cooker with non-stick cooking spray. Combine all ingredients in slowcooker and stir to mix well. Cook on LOW for 2-3 hours. Stir before serving.


ALEXIS NOTES: I skip the spray and use a crockpot liner and call it good!  As you see I used spiral noddles instead of spaghetti. And yes I skipped the mushrooms, no one here likes them.  I also put in noddles in a 1/2 hour before serving, I HATE mushy noddles, AND no I don't precook them.


Another super easy recipe!  Throw in crock-pot and forget about it!

What's on your menu tonight?

Don't forget to see the parties I link up to HERE.

Thursday, August 21, 2014

Cake Decorating Plans

Happy Friday Everyone!  I have yet again have a packed weekend!  I haven't even had time to make a post about my trip to Canada!  Over the weekend I will have to write that up!

I of course come back and sign up for a Cake to make for my favorite charity Birthday Dreams (bringing birthday's to homeless kids).  I signed up for TMNT and then a day ago I see a SOS on Facebook they need 2 more cakes for this week.  I of course say I can do one more ... lol.  So that will be my job this afternoon is delivering the 2 cakes.  

My TMNT Turtles
for a 6 year old

Footballs Cupcakes
They told me it was a sports themed.
I was thinking ok a young kid made a plan.
THEN I got the email with details for 16 YEAR OLD.
Crap I changed plan and this is what I came up with.

And every time I bake it's a mess around here
Rick always says this so when I saw this
Shirt I had to laugh!
Maybe Rick will buy it for me .. LOL

Wednesday, August 20, 2014

Crazy Work Out's

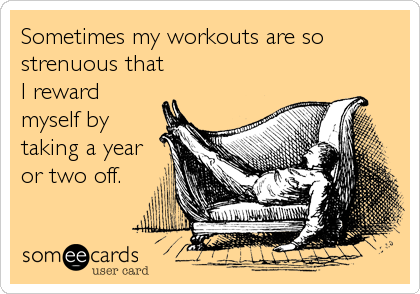
A little gym funny to make you laugh!  I've been trying my hardest to get to gym for a Insanity or RIPPED class at least 4 to 5 times a week.  NOW to get my portions back into control.  I've been letting it slip and not pleased but not going to beat myself either.   For so many years I myself would do this, I would tell myself I can't move I need to take a day off. BUT those days would go from one day to weeks and on and on. Staying strong and I hope to be back on track soon. In the meantime something to make you laugh.

Tuesday, August 19, 2014

Blueberry Scones

My last blueberry recipe of the week is one of my favorite treats! I made these for the volunteers and workers at the Boys and Girls Club.  These Blueberry Scones from La Petite Brioche turned out very moist and yummy!  The girls at the front desk said they were one of their favs I've made so far.

  • 2 cups all-purpose flour
  • 1/2 cup sugar
  • 1 tablespoon baking powder
  • 1 teaspoon kosher salt
  • 1 tablespoon grated orange zest
  • 1 stick cold unsalted butter, grated
  • 1 large egg, lightly beaten
  • 1/2 cup cold heavy cream
  • 1 cup blueberries, fresh or frozen
  • extra heavy cream for brushing the tops
  • raw sugar for sprinkling the tops
Preheat the oven to 400 degrees F.
In the bowl of an electric mixer fitted with a paddle attachment, mix 2 cups of flour, 1/2 cup sugar, the baking powder, orange zest, and salt. Add the cold butter and mix at the lowest speed. Combine the egg and heavy cream and, with the mixer on low speed, slowly pour into the flour and butter mixture. Mix until just blended. The dough will look lumpy.  Add the blueberries to the dough, and mix on low speed until blended.
Dump the dough onto a well-floured surface and knead it into a ball. Flour your hands and a rolling pin and roll the dough 3/4-inch thick. You should see small bits of butter in the dough. Keep moving the dough on the floured board so it doesn't stick.
Shape the dough into a square. Cut the square into quarters then cut again into eighths, diagonally, making triangles. 
Brush the tops of the scones with heavy creme, sprinkle with sugar and bake for 20 to 25 minutes, until the tops are browned and the insides are fully baked.


What a fun way to bring blueberries into a scone!

Any yummy scones in your future?
Don't forget to see the parties I link up to HERE

Monday, August 18, 2014

Brown Sugar Blueberry Cookies

Next on my to do list with the blueberries from my parent's tree's was a treat for my bestie who watched the boys while I was away in Canada for work.  I found these Brown Sugar Blueberry Cookies on Sweet Pea's Kitchen (I love this site since this is my dad's nickname for me).   NOW I did use frozen blueberries which made the dough a little hard to work with when they came out of the oven it was a little difficult to get them off the sheet.  BUT I did test them and they were extremely yummy!!!

Ingredients:

1 3/4 cups all-purpose flour
1/4 teaspoon salt
1/2 teaspoon baking powder
1 1/2 teaspoons cinnamon
1 stick butter, at room temperature
3/4 cup packed brown sugar
1 egg
1 teaspoon vanilla extract
1 tablespoon milk
3/4 cup fresh blueberries
1/2 cup granulated sugar, for rolling dough

Directions:

Adjust the oven racks to the upper- and lower-middle positions and heat the oven to 375 degrees F. Line 2 large baking sheets with parchment paper or spray them with nonstick cooking spray.
In a medium bowl, whisk the flour, salt, baking powder and cinnamon; set aside.
In the bowl of a stand mixer with the flat beater attached, cream the butter and brown sugar at medium speed until light and fluffy, about 3 minutes. Scrape down the sides of the bowl with a rubber spatula as needed. Add the egg and vanilla; beat at medium speed until combined, about 30 seconds. Add the dry ingredients and beat at low speed until just dough comes together, about 30 seconds. Add in milk. If dough is still crumbly, add milk 1 tablespoon at a time until it comes together. Fold in blueberries gently with a spatula.
Place the ½ cup sugar for rolling in a shallow bowl. Fill a medium bowl halfway with cold tap water. Dip your hands in the water and shake off any excess (this will prevent the dough from sticking to your hands and ensure that the sugar sticks to the dough). Roll a heaping tablespoon of dough into a 1½-inch ball between moistened palms, roll the ball in the sugar, and then place it on the prepared baking sheet. Repeat with the remaining dough, moistening your hands as necessary and spacing the balls about 2 inches apart (you should be able to fit 12 cookies on each sheet).
Bake until the cookies centers are just set and very lightly colored, 15 to 18 minutes, rotating the baking sheets front to back and top to bottom halfway through the baking time. Cool the cookies on the baking sheets about 3 minutes; using a wide metal spatula, transfer the cookies to a wire rack and cool to room temperature.

What a fun way to bring blueberries into a cookie!

Any yummy cookies in your future?
Don't forget to see the parties I link up to HERE

Sunday, August 17, 2014

Blueberry Cheesecake Fudge

My parents have around 8 blueberry bushes in their yard.  My dad spent a few days and picked all the blueberries and brought them over to my house.  Into my freezer they went and onto Google I went!  I wanted to bring something yummy to the volunteers and staff at the Boys and Girls club.  They help me out so much watching the boys during the day.


I found this amazing recipe for Blueberry Cheesecake Fudge on About.com.  Let me tell you it was so freaking amazing.  I had to get these out of the house quick before I ate every last bit of them.  Let's just say I had just a few bites ... ok who am I kidding!  I doubled the recipe to make a large batch for them.

Ingredients:

  • 6 sheets of graham crackers
  • 8 ounces cream cheese softened to room temperature, divided use
  • 2.5 cups plus 2 tbsp granulated sugar
  • 3 cups miniature marshmallows
  • 1 (12 oz) bag white chocolate chips
  • 1/2 stick (2 oz) butter
  • 1 cup dried blueberries
  • 2 tsp vanilla extract
  • 2/3 cup evaporated milk

Preparation:

1. Prepare a 9x9 pan by lining it with aluminum foil and spraying the foil with nonstick cooking spray.
2. Place the graham crackers in a food processor or blender and blend until you have very fine crumbs. Add two tablespoons of granulated sugar and 1.5 ounces of softened cream cheese, and pulse until the mixture starts to come together and looks crumbly. It should hold together if you squeeze it in your hand, but should not be too moist or sticky. Press the graham cracker mixture into a thin, even layer on the bottom of the prepared pan. Don’t worry if it seems too dry to form a solid crust--the layer of fudge on top will solve that problem.
3. Place the sugar, butter, evaporated milk, and miniature marshmallows in a large saucepan over medium heat. Stir until the butter melts and the sugar dissolves. Bring the mixture to a boil, stirring frequently.
4. Once boiling, begin to stir constantly and cook, stirring, for five minutes. After five minutes remove the saucepan from the heat and stir in the remaining 6.5 oz of cream cheese and the white chocolate chips. Mix until the fudge is entirely smooth and free of lumps. If the white chocolate chips do not dissolve easily, return the pan to the heat briefly and stir over the heat until they melt.
5. Add the dried blueberries and vanilla to the fudge and stir until they are well-mixed. Pour the fudge into the prepared pan and smooth it into an even layer. Refrigerate the fudge until it is set, at least 4 hours.
6. Once set, remove the fudge from the pan using the foil as handles. Cut the fudge into small one-inch squares to serve. Store Blueberry Cheesecake Fudge in an airtight container in the refrigerator for up to one week, and bring to room temperature before serving.
ALEXIS NOTES: I doubled recipe.  I also used frozen blueberries which was nice touch but when I put them down it didn't allow the graham cracker mix to stick to the fudge so I lost part of the cheesecake taste.  Next time I'll pour some fudge down then lay down the blueberries and top with the rest of the fudge.


Enjoy but be-careful you may not stop eating them!
Yes this was over 2 days.


Tray all filled up to go to the club:

Don't forget to see the parties I link up to HERE

Created by MyFitnessPal - Nutrition Facts For Foods

Thank You to My Wonderful Sponsors!!!

1800flowers
Baby Pop
BzzAgent
cafe Press
CSN
Easy Lunch Boxes
Faith Words
Glasses USA
Great Wolf Lodge
Hachette
Jump Start
My Baby Clothes Boutique
My Blog Spark
Ouchies
Pleasures.com
red envelope
She Speaks

tote bags
Strap Doctor
You Can Make This

Total Pageviews

Awards I've been Given! You Really Love Me!! (Yes my best Oscar Speech)

Photobucket
Photobucket
Photobucket
Photobucket
Photobucket
Photobucket
Photobucket
Photobucket
Photobucket
friendhip2 from Anissa
passoinate-blogger-award (Heidi @ Tried & True Cooking)
You're a Superstar Blogger
you-dont-say-post - Kristie Notes
Annisa (Over the top)
Jessica Mommy Needs Coffee (Lovely)
Annissa (Queen Award)
Your Blog is Fabulous
Best Comedic Performance
Splash Award
Best Blog Award
Dragon's Loyalty Award
Photobucket
The Heartfelt Award
Daffy Commenter Award
 
Pin It button on image hover