Protected by Copyscape Web Plagiarism Check

Thursday, August 29, 2013

First Week at New School in the BAG!

As some of you may know the boys have been attending faith based schools (Cole since PreK to 3rd and Caden K).  When it came time to enroll them I had to step back and really think what was best.  Cole was having a hard time in 3rd Grade, he was being bullied by 2 kids and the new teacher that also teaches 4th and 5th just didn't gel well together.  We had several problems and you know about the science fair how that turned out.  Cole was not wanting to go to school, since it's a small school the 2 kids that bullied him would always be in the same class and follow him to all grades. UNLESS one leaves, and it turns out that one leaving would be us.  NOW don't get me wrong Cole is a handful, with issues sitting still and needing more one on one time I totally know how it goes.

But what do we do, we bought this house as a bankrepo to fix it up and sale before the kids go to school (that was 10 years ago). Market crash etc and here we still are!  So I wanted the kids to go to private to not be in the school next to the house.   I was torn all summer long on what to do.  A few weeks at the end of summer, Caden bugged me to go see our old neighbor son who moved a few blocks away. I got a hold of his mom and we set up a playdate by chance she asked me about school etc.  I'm so excited the boys will be going to her house before and after school and since she is in a different school same school district.  

Tuesday was our first day!  I took off the morning to get them to school meet their teachers and gave the teachers their gift.  It was perfect place and the people where so nice.  I'm thrilled to say that Cole came home saying how much he loves his new school and teacher and likes that she only has 4th grade not other grades to teach.  Giving more attention to him and his class, perfect for him.  Class size is small also around 20 which is a little more then the 16 he had before but really it works perfect.  Yes it's the first week and I'm sure we'll have things happen, but I thank God that it seems to be a good fit.  Cole also told me that he wants to be nice in class because he doesn't want to disappoint his teacher, may also help she is young (24) and very cute :).

First Day & Lunch made
First Bus ride home!
Cole's Sign Says he wants to be a Scientist
Caden's Sign says he wants to be a baseball player
(for you who know him giggle, he is so not a sports kid)

2nd Day First Bus ride to school!
Lunches Day 2 and 3.

Have a GREAT weekend!!!

Wednesday, August 28, 2013

Forgive me I couldn't resist ...

I don't watch the VMA's so I was totally clueless about the whole Miley Cyrus gone bad trying to do Micheal Jackson moves that only he could pull off or even at times was a bit much (don't hate me).  So I was totally in the dark when FB blew up about Miley and her performance.  So I did like anyone would do and Googled it, what the heck did I do before the internet?  I must say even I was a little put off and shocked by it.  Next thing you know she'll be shaving her head like Brittany ... (oh I know I couldn't resist).   Poor thing I really do feel bad for her.  It makes me sad to see the youth in the audience eating it up and clapping, they did pan onto some of the other performers that had the same look as me.  

Thought you all could use a laugh today and sorry if I offend anyone.

Funny Flirting Ecard: Just wanted you to know I'm dirtier than a former Disney Channel star.

Back to our normal programming tomorrow 
as you can tell I'm burnt out and have nothing to give .. lol

Tuesday, August 27, 2013

Back to School ... Weekly Clothes Organized

Since I work from home I have the luxury of clocking out and helping the kids in the morning to get ready for school.  Which is great but I have one who doesn't like to get up and one who wants me to do everything for him.  So getting dressed can be a pain.  I came across a weekly clothing organized on The Gunny Sack.  This was super easy and the boys loved picking out their own clothes and shoes to match of course!  I must say day one went pretty smooth using this!


What you need:

Organizer (I found one at Target for 6 openings)
Card Stock or Printed Fabric & Felt
Printer
Glue Gun
Self Lamination Pockets (business card size) - Optional
Foam - Optional

I hung up on the back of the boys door until we get their closet fixed.  I didn't use the printed fabric and felt like she did since I know how rough my boys are.  I found these really cool self adhesive lamination pockets that I cut the daily labels into.  I made a little ledge from foam to be glued to the organizer.  I'm a glue gun girl and glued it all together :).


Easy Peasy!

Don't forget to see the parties I link up to HERE.

Monday, August 26, 2013

Back to School ... Back to School Survival Kit

The boys start school tomorrow and I wanted do something special for our new school and teachers.  Last year I did the supply cakes and even though these teachers haven't seen those that I did, I still wanted to do something new.  I was searching Pinterest and came across a Back to School Survival Kit on Funky Polkadot Giraffe.

This was yet another simple thing to do that I really hopes brings a smile to their day.  I was able to pick all the items up at the dollar store, making each basket under $20.  I hope you give this a try and make sure to say thank you to Kyla for this great idea.


What you need:

Animal Cookies
Band Aids
Chewing Gum
Crayons
Candle
Erasers
Lifesavers
Marbles
Mound Bar
Paperclips
Pencils
Hand Sanitizer
Rubber Band
Penny
Starburst
Tissues
Toothpicks
Coffee

Click the picture to see the fun sayings for each item

I added a little tissue paper to the bottom of each of my baskets to give it a little height plus it helps keeps things stable in the baskets.  I added the items by height and just played around.  When I liked the way it looked I then went to the printer.  She is kind enough to make two pdf's for you to use.  You all know how I feel about great people who make free templates, love them!!  I printed on card stock, I was able to copy and paste the front label into a word sheet so I could print two per page to save paper :).  I used my handy dandy glue gun to glue the label on the front and I slide the fun ingredients list in the back.  


I can't wait to see the teacher's faces tomorrow!  Hope you all have a fab week, thanks so much for stopping by and saying hi.

Don't forget to see the parties I link up to HERE.

Sunday, August 25, 2013

Back to School ... Apple Sugar Cookies

I had this brilliant idea to make cookies for the kids at the Boys and Girls Club.  Really how hard would 220 cookies be?  hehe that was until I decided to do yet again something fun and creative looking.  I found a fun Apple Sugar Cookie on Living Locurto, one of my favorite sites for fun things to make.  One day I may listen to Rick and stop doing so much, until then my friends, you get to see all the fun ideas :).


What you Need:
Sugar Cookie Dough (see recipe below)
Red Coloring
Green Coloring
Leaf Cutter (or you can hand cut)
Mini Cupcake Liners
Pretzels
Red Icing (for glue)

Make your sugar cookie dough, take 1/4 of the dough to make it green.  I use Wilton Icing Color as my food coloring for all projects.  Take the 3/4 of the dough and dye it red.  Roll out the green to make your leaf's.  I used my Martha Stewart Apple cookie cutter and used just the leaf part to punch out leaf's.  I baked them at 350 for 8 minutes (her recipe said 10, my oven runs hot).  For the red I rolled into small balls and put it in a mini cupcake liner and baked in my mini cupcake pan and baked them at 350 for 14 minutes (her recipe said 18, again my oven runs hot).  Once baked, I took a wood dowel to make a hole.  I broke off 1/3 of a pretzel and inserted in the hole.  I took a little red icing to glue the leaf onto the top of the apple.


It took a few hours but I was able to make exactly 220 cookies, enough for all the kids at the club.  I was so excited that the kids loved them and the boys were so excited to tell there friends there that they helped mom make them.


For the sugar cookies I used a Classic Sugar Cookie Recipe I found on My Recipes.

Ingredients:
  • 1 cup butter or margarine, softened
  • 1 cup granulated sugar
  • 1 large egg
  • 1 teaspoon vanilla extract
  • 3 cups all-purpose flour
  • 1/4 teaspoon salt

Directions:

1. Beat butter at medium speed with an electric mixer until creamy. Gradually add 
granulated sugar, beating well. Add egg and vanilla, beating well. Combine flour and salt. 
Gradually add to butter mixture, beating until blended. Divide dough in half. Cover; 
chill 1 hour.
2. Roll each portion of dough to 1⁄4-inch thickness on a lightly floured surface. 
Cut with desired cookie cutters. (We used flower and starfish cutters.) 
Place on lightly greased baking sheets.
3. Bake at 350° for 8 to 10 minutes or until edges of cookies are lightly browned. 
Cool cookies 1 minute on baking sheets, and remove to wire racks to cool completely.


Hope you make them, it really was easy just not in the volume I made :). LOL

Don't forget to see the parties I link up to HERE.

Thursday, August 22, 2013

S'More Cookies Featured

I'm so excited to see that my S'more Cookies I posted about were featured on Adorned From Above! 

Adorned From Above


Hope you all have a wonderful weekend!  I'm still up to my eyeballs trying to get this new system at work all worked out and the data in.  Sorry I haven't been around much to say hi, I'll catch up this weekend!

A big thank you again to Adorned from Above!  These cookies were a huge hit with the boys and girls club helpers.

Wednesday, August 21, 2013

Pizza Palooza ... Macaroni n' Cheese Pizza

Before you make a funny face just think of it your yummy gooey favorite mac and cheese served on your favorite pizza crust!  Ok yes it may sound weird but the boys thought it was a hit!  A big Thanks to Kim from Makin' it Mo Betta for this Macaroni n' Cheese Pizza


Macaroni and Cheese Pizza 

Macaroni and Cheese (or out a box)
1/2 cup shredded cheddar cheese
Homemade pizza crust (Or Premade pizza crust)
Bacon (or Bacon Bits)

Prepare macaroni and cheese and pizza crust.  I pre-baked the dough, then spread macaroni and cheese over the crust.  Sprinkle the 1/2 cup shredded cheese and bacon over the top.  Pop back into the oven until everything is nice and melty and crust is completely done.


Macaroni n' Cheese (recipe I used)
INGREDIENTS:
8 ounces uncooked elbow macaroni
2 cups shredded sharp Cheddar cheese
1/2 cup grated Parmesan cheese
3 cups milk
1/4 cup butter
2 1/2 tablespoons all-purpose flour
2 tablespoons butter
1/2 cup bread crumbs
1 pinch paprika
DIRECTIONS:
1.Cook macaroni according to the package directions. Drain.
2.In a saucepan, melt butter or margarine over medium heat. Stir in enough flour to make a roux. Add milk to roux slowly, stirring constantly. Stir in cheeses, and cook over low heat until cheese is melted and the sauce is a little thick. Put macaroni in large casserole dish, and pour sauce over macaroni. Stir well.
3.Melt butter or margarine in a skillet over medium heat. Add breadcrumbs and brown. Spread over the macaroni and cheese to cover. Sprinkle with a little paprika.
4.Bake at 350 degrees F (175 degrees C) for 30 minutes. Serve.


Homemade Pizza Dough (recipe I used)
INGREDIENTS:
1 (.25 ounce) package active dry yeast
1 teaspoon white sugar
1 cup warm water (110 degrees F/45
degrees C)
2 1/2 cups bread flour
2 tablespoons olive oil
1 teaspoon salt
DIRECTIONS:
1.Preheat oven to 450 degrees F (230 degrees C). In a medium bowl, dissolve yeast and sugar in warm water. Let stand until creamy, about 10 minutes.
2.Stir in flour, salt and oil. Beat until smooth. Let rest for 5 minutes.
3.Turn dough out onto a lightly floured surface and pat or roll into a round. Transfer crust to a lightly greased pizza pan or baker's peel dusted with cornmeal. Spread with desired toppings and bake in preheated oven for 15 to 20 minutes, or until golden brown. Let baked pizza cool for 5 minutes before serving.

Enjoy and watch the smile around you.

Don't forget to see the parties I link up to HERE.

Tuesday, August 20, 2013

Pizza Palooza ... Meat Lover's Pizza

We continue our Pizza Palooza with a meat lover's pizza the boys made.  I made a simple pizza dough that I found on Smitten Kitchen.  We topped their pizza's with a meat lover's dream.  The boys just love when we do pizza night and they get to make it all by themselves!


Caden's Creation

Cole's Creation

Meat Lover's Pizza
Pizza Dough (see recipe Below)
Pepperoni or Salame
Canadian Bacon
Ham (my dad smoked a ham)
Cheese
Pizza Sauce

Roll out your dough to the thickness you like.  Add pizza sauce, then top with favorite toppings and your cheese.  Bake at 350 for 10 to 15 minutes.

Pizza Dough
Ingredients:
1 1/2 cups flour (can replace up to half of this with whole wheat flour)
1 teaspoon salt
3/4 teaspoon active dry yeast
1/2 cup lukewarm water (may need up to 1 or 2 tablespoons more)
1 tablespoon olive oil


ALEXIS NOTES: I used the 1/2 whole wheat always trying to get a little in :).

Steps:
Stir dry ingredients, including yeast, in a large bowl. Add water and olive oil, stirring mixture into as close to a ball as you can. Dump all clumps and floury bits onto a lightly floured surface and knead everything into a homogeneous ball.

Lightly oil the bowl (a spritz of cooking spray perfectly does the trick) where you had mixed it — one-bowl recipe! — dump the dough in, turn it over so all sides are coated, cover it in plastic wrap and leave it undisturbed for an hour or two, until it has doubled in size.

Dump it back on the floured counter, and gently press the air out of the dough with the palm of your hands. Fold the piece into an approximate ball shape, and let it sit under that plastic wrap for 20 more minutes.

Sprinkle a pizza stone or baking sheet with cornmeal and preheat your oven to its top temperature. Roll out the pizza, toss on whatever topping and seasonings you like.  Bake it for about 10 minutes until it’s lightly blistered and impossible to resist.


I hope you enjoy this it is an easy thing to do and the kids really enjoy building their own meal!

Don't forget to see the parties I link up to HERE.

Monday, August 19, 2013

Pizza Palooza ... Dessert PB Cookie Pizza

As my husband says why not have a restaurant that starts with dessert then let's you have dinner!  So why not start out my Pizza Palooza week of recipes with a PB Cookie Pizza I found on Urban Jane.  This was a simple one to make and was a hit with the kids!  I took a sniff and it sure did smell good (yes I'm being a good girl and sticking to my diet).

I had Reese's Piece's on hand from a previous recipe that I needed yellow candy and the only way to find them was to buy these and pick them out ... lol yes it works but hey I then had it on hand for this recipe!


Ingredients:
1/2 cup butter, softened
1/2 cup peanut butter
1/2 cup sugar
1/2 cup packed brown sugar
1 egg
1/2 tsp vanilla extract
1 & 1/2 cups all purposed flour
2 cups miniature marshmallows
2 cup semi sweet chocolate chips (recipe called for 1 cup but we both used 2 cups)
1 cup Reese's pieces (or any other toppings you like)

Directions:
- in a bowl, cream butters & sugars together. Beat in egg & vanilla. Stir in flour & chocolate chips until well blended.
- spread dough onto greased pan. Bake at 375 degrees for 12 minutes. Sprinkle with marshmallows & Reese's pieces. Bake 5-6 minutes longer or until lightly browned.
-let cool on baking sheet


Hope you enjoy this recipe!  It sure was easy to make and everyone seemed to leave with a smile.


Don't forget to see the parties I link up to HERE.

Sunday, August 18, 2013

I think I had a weekend ...

Well I think I may have sat down for a second this weekend!!  I made the cake and I really liked how it turned out!  I got school shopping wrapped up!  I got my hair done!  Then I worked a crazy amount, we started a new system at work and I had to get it ready for Monday.  Simple it may be but a lot of work has to go into getting it ready.  I'm beat, I spent more time in front of my computer this weekend then I have in a very long time!  I hope to say it is ready to go and I won't be doing that again!  Needless to say I have to interrupt my Monday recipe and will have to post it Tuesday!


Photo: Going to end the summer with a new shorter do!  Man hope I can pull this off ... Lol I think I can!  Thank u Kari as always a great cut and color!

Be Back tomorrow with a yummy recipe :)

Thursday, August 15, 2013

What I plan to do this weekend ...

This is going to be a full weekend yet again.  Cakes to make and time to get my hair done!

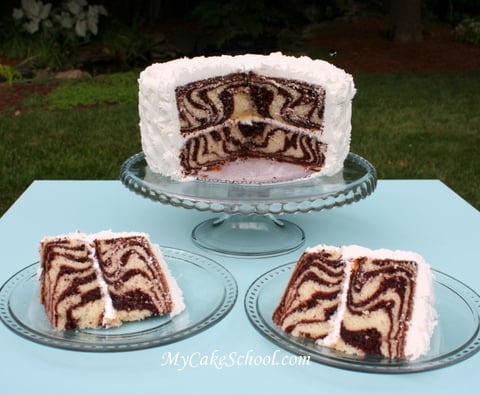
First off I have a cake to make!  My old roommate from years ago asked if I would make a Leopard print and Zebra print cake for her daughter's 13th birthday party.  You know me I can't just do a normal cake in the center!  I thought I'd do fun cakes inside fondant.

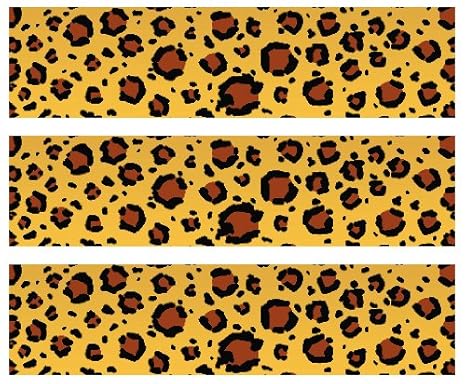
First off I found really cool zebra and leopard print edible strips that can be added to a cake for decoration.  


Then I found an idea to make a zebra and leopard print inside the cake!


Found on Artese

Last on the list is a new do!  I'm going to go short!


Have a great weekend!

Wednesday, August 14, 2013

My Supply Cake Featured .... On Diana Rambles

My amazing blog designer and friend has featured my supply cake on her blog!  Please go check it out and leave some love!  The supply cake feature is on Diana Rambles.  And if you need a new blog done check her out, she does an amazing job and at a reasonable rate.


school supply cake instructions

Now head over to get the instructions on how to do it!

Thank you also Diana for your kind words on weight loss. xoxo

Tuesday, August 13, 2013

Summer Time .. Too Hot for Coffee - Try it in Lotion or a Scrub

Oh Coffee how I miss thee .. I'm on Week 3 of my new diet and no coffee, yes I think I may die (just joking).  My amazing women's group leader at church had a birthday last week.  She is a Starbucks junky.  I wanted to do something fun for her birthday.  I have already made her the Coffee Lover's Gift (see picture at bottom of post with link) as a thank you gift for all she does for our group.  I then came across a really cool idea to make a Coffee Scrub and a Coffee Lotion on The Cheapskate Mom's Website. 

Super easy to make and I think it turned out GREAT and as you may know by now I'm all about the unique gift that you had to put thought into and swear this had all those check marks!


First I made the Coffee Scrub


What you need:
A Cup & Lid (I went to Starbucks and asked for gave to me for free)
1 1/2 Cups of Coffee Grinds
1/2 Cup Salt
3 tbs body Oil (I used Baby Oil / Mine was more like 6 Tbs)

Pour coffee in cup, add salt and body oil.  I found it was easier to put in a large mixing bowl then add back to the cup.  I didn't want anything to come out the straw hole on the lid so I took a little hot glue to the top and bottom of the hole. 


Next I made the Coffee Lotion


What you Need:
Cup with Lid (Again Starbucks gave to me for free)
Lotion (I bought plain but couldn't find so used a scented one)
6 Tbs Strong Coffee (I used a little too much and it was be watery)
Pump (I went to dollar Tree bought a soap and then used the pump only)

Brew a strong cup of coffee, let it cool.  I found it easier to put the lotion and coffee in a mixing bowl to mix then to add to the Starbucks cup.  Make sure it is mixed well.  Insert the pump into the hole in the lid.  I took my hot glue gun to glue the pump down to the lid.


This was a very simple gift to make but perfect for that coffee lover in your life.

Check out the Coffee Lover's Gift Also

IMG_5850

Don't forget to see the parties I link up to HERE.

Monday, August 12, 2013

Summer Time ... Dolphin Tail Cupcakes

A while back I showed the Dolphin Cake I made from 2 round cakes.  For that same party I made cupcakes for the kids.  I wanted to do something fun so I thought dolphin tails would be fun, then I thought I could use those edible pearls I bought a long time ago and never used.  They so could be the bubble's in the sea!  I didn't have time to order a dolphin cookie cutter, so I went to my 101 cookie cutter box and found an airplane.  I had an idea that the back of the plane looks like a dolphin tail .. idea born and in the bag!  

Cookie cutter on hand I went to my making my sturdy buttercream fondant that I love (click link below and you'll go to my favorite recipe I use).  My fondant is white so I needed to color it blue.  I hate regular food coloring, but love Wilton's Icing Colors.  I used Delphinium Blue Icing Color that was a beautiful blue that reminded me of the ocean.


I think the turned out pretty darn cute if I must say so myself.  I made so many and sadly not that many showed to the party so I think some may have been thrown out.  And the heat was so hot that day and the party was outdoors so the fins did start to bend but kind of looked like what it may when it comes out of the water so we just went with it ... lol.

What you need:
Cupcakes (Baked or Bought - Click her for my recipe)
Buttercream Frosting (Click here for my recipe)
Pearls (Wilton)
Fondant (click her for my recipe)
Blue Icing Color (Delphinium Blue)
Dolphin Cookie Cutter (Or use an airplane like I did)

Make your cupcakes and let them cool.  I pipped the sturdy frosting on and sprinkled with the pearls.  I made the fondant kneaded in the blue color to the right shade and then rolled it out.  I used the back end of the airplane cutter to make the tails.  I usually make the night before so it can sit out and dry out a bit but I ended up running out of time and made them the morning of the party.  So they didn't have time to firm all they way up like I would have liked.  


The cake and cupcakes were a real treat and I was so excited to give the birthday girl a special treat.  I was very pleased with how they turned out.

Don't forget to see the parties I link up to HERE.

Sunday, August 11, 2013

Summer Time ... Summer Camp Care Package

As you may know from my last weeks post that Cole got to go to Summer Camp with our church.  It's a whole week, sleep over camp.  I was so excited he got to go this year, this was a tight year and the church waived part of the fee and let me break it up into payments.  So I dropped him off at the church with his bags.  I wanted to surprise him with something special, last year I sent a bunch of cards but this year I saw an idea for an idea for a Summer Camp Care Package on Knock-it-Off Crafts.

She had call me cards in hers and I wish I would have remembered to do this, totally spaced on that one!  But there will be next year!


What you need:
Playing Cards
Glow Sticks
Chips
Licorice
Gum
Disposable Camera
Pix Sticks (Whatever Canndy you want)
Magazine or Comic Book or Mad libs (I put Phineas & Ferb Mag)
Games (Mine had Checkers, Old Maid, Bible Triva)
Cookies (I made some homemade cookies and boxed them up)


I made S'More Cookie's (click link for recipe)
Put them in a cute cupcake box!


I put everything in a USPS medium box that as long as it fit it ships for $11!  I decorated the inside with a fun message and sent it in the mail for a surprise for him.  I wish I could have a picture of his face when he opened this.

Don't forget to see the parties I link up to HERE.

Created by MyFitnessPal - Nutrition Facts For Foods

Thank You to My Wonderful Sponsors!!!

1800flowers
Baby Pop
BzzAgent
cafe Press
CSN
Easy Lunch Boxes
Faith Words
Glasses USA
Great Wolf Lodge
Hachette
Jump Start
My Baby Clothes Boutique
My Blog Spark
Ouchies
Pleasures.com
red envelope
She Speaks

tote bags
Strap Doctor
You Can Make This

Total Pageviews

Awards I've been Given! You Really Love Me!! (Yes my best Oscar Speech)

Photobucket
Photobucket
Photobucket
Photobucket
Photobucket
Photobucket
Photobucket
Photobucket
Photobucket
friendhip2 from Anissa
passoinate-blogger-award (Heidi @ Tried & True Cooking)
You're a Superstar Blogger
you-dont-say-post - Kristie Notes
Annisa (Over the top)
Jessica Mommy Needs Coffee (Lovely)
Annissa (Queen Award)
Your Blog is Fabulous
Best Comedic Performance
Splash Award
Best Blog Award
Dragon's Loyalty Award
Photobucket
The Heartfelt Award
Daffy Commenter Award
 
Pin It button on image hover